How to watch the Sweet 16 and Elite Eight this weekend


It’s time to lock in those brackets. The 2026 NCAA basketball tournaments, affectionately known as March Madness, begin this week. In fact, some of the action on the men’s side starts tonight. Both the men’s and women’s tournaments are available to stream through various apps and services, but navigating the web of broadcasters and TV channels can be confusing. We’ve broken down when all the games are happening, where to watch and the best options for saving some cash doing so.

What does the Sweet 16 and Elite Eight start?

The men’s NCAA Basketball Tournament Sweet 16 begins on Thursday, March 26 with four of the eight games. The first game begins at 7:10PM ET with the others following at 7:30PM ET, 9:45PM ET and 10:05PM ET. A similar schedule is expected for the second slate of Sweet 16 games on Friday, March 27. The Elite Eight will then follow on Saturday, March 28 and Sunday, March 29 with two games each day. Start times haven’t been announced for those just yet.

On the women’s side, everything is offset by a day. The first four Sweet 16 games take place on Friday, March 27 at 2:30PM ET, 5:00PM ET, 7:30PM ET and 10:00PM ET. The second set of matchups follows on Saturday, March 28 at 12:30PM ET, 3:00PM ET, 5:00PM ET and 7:30PM ET. The Elite Eight matchups are on Sunday, March 29 and Monday, March 30 with two games each day, but start times haven’t been announced for those.

Here’s the full schedule for each tournament:

2026 Men’s NCAA Basketball Tournament

  • Second round: March 21-22

  • Championship game: April 6

2026 Women’s NCAA Basketball Tournament

  • Second round: March 22-23

  • Championship game: April 5

How to stream the 2026 Men’s NCAA Tournament

Jacob Kupferman via Getty Images

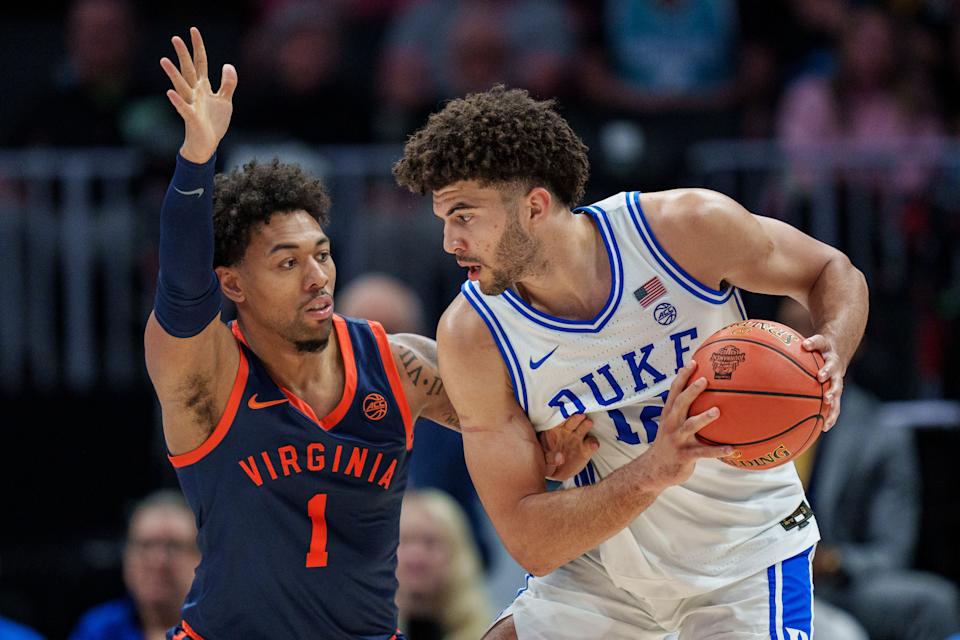
CBS and Warner Bros. Discovery share the broadcast rights to the men’s tournament, so TV coverage will be spread across four networks. During the course of March Madness, games will air on CBS, TNT, TBS and truTV, with the final rounds and championship game landing on TBS.

If you already have a paid TV plan (such as traditional cable), a good way to watch the men’s tournament is with the March Madness Live app or website. There’s a big catch though: CBS games aren’t available in the app. That means this is really only a good option through the Elite Eight. Once you log in with your TV provider credentials, you can watch games on the other networks in one spot with features like multiview (up to four games at once) and a Fast Break stream that covers all the in-progress games in one spot.

The app also offers ways to follow your bracket, if you filled it out on MarchMadness.com. And when you’re watching on desktop, the crucial Boss Button will throw up a fake work screen to keep your job safe. In addition to your laptop or phone, March Madness Live is also available on Amazon devices, Fire TV, Apple TV, iOS, macOS, Google Play, LG smart TVs, Roku and Xbox consoles.

The most affordable option to watch every game is to actually use two services. It’s not ideal, I know, but it will save you a lot of money. HBO Max’s Basic plan is $11/month and gives you access to live games from TNT, TBS and truTV with three-game multiview (46 games total). That includes the Final Four and National Championship as those three games are on TBS this year. If you splurge for a pricier plan ($23/month), you can stream games in Dolby Vision with Dolby Atmos surround sound. For the CBS games, you’ll need a Paramount+ Premium subscription that costs $14/month ($6 for two months for new users). So, with this best price scenario, streaming all of the men’s tournaments will cost $25 across two apps.

A live TV service like YouTube TV or Hulu + Live TV is over $80 more per month at full price, but they would offer you all the games in the men’s tournament in one place. YouTube TV is currently on sale for $60/month for the first two months after a free 10-day trial. Hulu + Live TV now includes Disney+ and ESPN Select, hence its higher price.

How to stream the 2026 Women’s NCAA Tournament

Joe Buglewicz via Getty Images

While Warner Brothers Discovery owns the rights to the men’s NCAA Tournament, ESPN has the women’s bracket locked down. Every game of the women’s tournament will be spread across ABC, ESPN, ESPN2, ESPNU and ESPNEWS, including the First Four matchups. The Final Four will be on ESPN, but the championship game will air on ABC. All three of those culminating games will stream on ESPN+ (and in the ESPN app) as MegaCast feeds.

ESPN says the MegaCasts are available in two options. First, Beyond the Rim provides an aerial camera angle with the main commentary and replays, plus the addition of enhanced stats. On the Rail shows you game action the full length of the floor. This feed will offer “natural” sound and replays.

Since ESPN+ won’t get every game, it’s not an option if you want to watch the entire tournament. However, since last year’s March Madness, Disney debuted standalone offerings for ESPN. The most affordable option here is ESPN Select which includes women’s college basketball and costs $13/month.

You could also opt for a live-TV streaming service like Sling, YouTube TV or Hulu + Live TV for a comprehensive experience. Sling is the cheapest of these, with the requisite Orange and Sports Extra plan costing $57 (Sling is currently offering a discount on the first month of Orange). YouTube and Hulu live TV options are both more expensive at over $80/month (YouTube TV currently discounted to $60 for the first two months), so it’s a matter of which set of content and features you like best. YouTube TV offers a handy multiview tool so you can watch up to four games at once, but Hulu + Live TV comes with Disney+ and ESPN Select for that cost.

Once you have a TV plan that includes the ESPN family of networks, the ESPN app is the best place to watch the tournament. The mix of scores and info, along with multiview streaming for up to four games at a time on Apple TV and Xbox, make the app a well-equipped conduit for the women’s tournament.

The March Madness website only shows scores and news for the women’s tournament. None of the women’s games will be available for streaming live on the website.

Are any of the March Madness games available to stream for free?

Michael Reaves via Getty Images

Without a TV provider login, you can watch all of the games broadcast on CBS on the March Madness website and mobile apps. Sure, it’s a small sample of the tournament, but it’s completely free and a good option for casual fans who don’t have a paid TV plan they can exploit for more of the action. It’s also a good way to watch the first round at work, if your company hasn’t blocked streaming sites, or if you can discreetly watch on your phone.

For the women’s tournament, there aren’t any games available for free. Unless you have an old-school OTA antenna, that is, in which case you can watch women’s games on ABC (and men’s games on CBS) without any kind of streaming plan. Of course, as this is a streaming guide published in 2026, I’d consider an antenna an extraordinary move.

If you were hoping to use a free trial period to watch March Madness, I’ve got bad news. None of them will last long enough to cover the entire tournament. Some services don’t offer a free trial at all, but the longest is YouTube TV at 10 days. Sadly, that won’t even get you through the second weekend.

What if I want to stream both the men’s and women’s tournaments?

If you’re hoping to stream all of the men’s and women’s NCAA tournaments, I hope you ordered Samsung’s eight-TV bundle. In terms of streaming services, just jump straight to a live-TV option like YouTube TV or Hulu + Live TV. I prefer the former because of its multiview feature. At times when there are multiple games that you want to watch, especially during the first two rounds, you’ll want multiview in order to keep tabs on all of the action.


Source link

Leave a Reply

Subscribe to Our Newsletter

Get our latest articles delivered straight to your inbox. No spam, we promise.

Recent Reviews


What are Custom Settings in Salesforce?

Custom settings are objects that developers use to create different customized sets of data that have an association with the company, user, or profile. There are options where you can set the custom settings to either public or private. Some of the areas where custom settings get applied are the fields, Apex, flows, SOAP API, and validation rules. The data created by customer meetings must meet the user’s needs, allowing users to access it faster using the application cache. 

When you have data using the settings, users do not need to use database querying languages or the Salesforce Object Query Language to get the data. It uses custom objects which developers build to fix all the business processes and information that does not work well with the Salesforce objects. Many businesses should learn how to use custom settings and benefit from them. Some of the custom fields that the developers use are currency, checkbox, phone number, date and time, URL, text, number, textarea, percent, e.t.c.

The settings can lack some fields like lookups, formulas, picklists, e.t.c. which are important to use. It also lacks page layouts that developers can use. The lack of layouts forces developers to use visual force pages to meet the requirements. When working with these settings, there are no rules that one must use. 

                  Wish to make a career in the world of salesforce? Start with HKR’S  salesforce online training 

Types of Salesforce Custom Settings

We have two types of custom settings. This are:

List Custom Settings

It works with how the custom objects function. The main purpose of this custom setting is to cache all the data. It reduces the cost of the data due to easy access to the data. It makes the accessing of static data across the company easy. It eliminates the use of SOQL queries which are sometimes against the limits. What the users need to do is put the data in this type of setting without writing any SOQL for accessing the data. The data provided in the list settings does not vary according to the users or profiles, making it impossible for anyone in the company to access it.

The data is useful to different departments of the company. It enables the developers to have reusable data which everyone can access in the company. This setting is good for the type of data sets that companies use mostly in their salesforce applications.

We create a list custom settings by following the steps below:

  • Locate the menu and search for the Schema settings, toggle the button of Manage list custom settings to turn it on. By default, most of the settings are in hierarchy custom.
  • Under the Custom Setting Definition, input the names under the label and Object Name and then change the Setting type from Hierarchy to List.       List Custom Settings   
  • When working with data like phone numbers, when you input the country codes into the labels, It automatically fetches into the form without querying the database. After filling in the details under the label and other fields, click on the Save button.
  • Navigate to the custom fields, click on the New button, and it will open a new page where you get prompted to choose the Data type and choose the type according to the data you entered in the custom definition. If it was phone numbers, choose the phone and click Next. We will select text. 

List Custom 

  • On this page, there are several fields like Field label, length, field name, Description, e.t.c. Fill them out and click Save.
  • Under the created label, click on the Manage option to provide new fields.

created label

  • After all, the new fields click Save, and you can view your complete list of custom settings.

Salesforce Training

  • Master Your Craft
  • Lifetime LMS & Faculty Access
  • 24/7 online expert support
  • Real-world & Project Based Learning

Hierarchy Custom Settings

Hierarchy custom settings help in ensuring the majority have the advantages for users. Its logic is efficient and enables users to customize their settings using different settings and rows. The settings match particular profiles and contacts that will meet the requirements of the company’s clients. This type of setting can scan all the client companies and their necessary profiles, look at the tasks handled by different people, and ensure that the final values shown to the user are more accurate and specific to what they want. 

It makes the companies make certain settings to several profile settings meant for the users, which get subjected to the user settings individually. They help the companies and their clients to define all their data hierarchically. This type of setting is suitable when defining defaults used by specific Salesforce applications, relying on the users, companies’ needs, and certain profiles. Hierarchy custom settings sync well with the Salesforce functionalities since they are highly customizable, and you can change them to meet the customer’s needs.

We can create an example of a Hierarchy Custom Setting using the steps below:

  • Navigate to the Custom Settings option, input the data under the Label, Object Name, Setting Type by default is a hierarchy and click on the Save button.
  • A new dialog box will open, and you will get prompted to choose the type of data type, select the one that matches your inputs, and Save.
  • Under the next step, fill in your Field Label, Length, Field Name, and Description, among others, and click on the Save option.

Hierarchy Custom Settings    

  • When the dialog opens, click on the New button to create organizational access to the data.
  • After saving, you will get options to add other alternatives.
  • Another dialog box will pop up, prompting the administrator to add the profiles that will get associated with the values. When you click the Save button, several users will be under the custom settings. And that’s the whole process of creating the hierarchy of custom settings.
How to Create Custom Settings

Log in to your Salesforce CRM, locate the Custom Settings, and several fields require one to fill. Under the label and Object name, input worker for both fields. Under the Settings section, choose between list and Hierarchy. Under Visibility, set it to public, enter the Description, then click on the Save button.

How to create custom settings

In some cases, you find that some parts of the settings section got disabled, you need to navigate to the schema settings and change the settings to enable it. Go to the custom fields and create the field by entering data into Field Label, Data type, API name, and action. To add data, hover over the Action settings to add more data.

Enroll in our Siebel CRM Admin Training program today and elevate your skills!

HKR Trainings Logo

Subscribe to our YouTube channel to get new updates..!

Why do we need Custom Settings?

Using custom settings in the Salesforce CRM and applications has several benefits. This include :

  • It allows faster fetching of data, for example, if you have many records and you want to retrieve one row, you will use custom settings to get the result in a short period due to the ability of customer settings to get stored in the cache.
  • They also avoid the chances of hitting the governing limits. There are several governing limits from SQL queries, DML statements, Sendmail methods, SOSL queries, e.t.c.
  • Due to the use of application cache, one can have faster data access, leading to better performance.
  • It enables the users to access different data according to the user’s profile and role in the organization, which promotes data integrity.
  • If you lack knowledge about databases or the Salesforce Object Query Language, it helps you avoid learning them.

                  Wish to make a career in the world of salesforce? Start with HKR’S  salesforce online training  in Canada 

How to Fetch Custom Settings in Salesforce?

There are several ways of fetching custom settings in Salesforce. These methods are:

To fetch custom settings, it depends on the type of custom settings. Let us look at all types of settings.

How to fetch data on list custom settings.

We use the getAll() method to fetch certain custom fields found in List settings. The method returns a list of the names and all the setting records i.e 

Map var =

CustomApiName.getAll();

Eg: Map worker = Worker__c.getAll();

We use the getValues() method  to fetch the values that match with a certain dataset. It normally works for both the custom settings i.e 

CustomApiName var = CustomApiName.getValues(name of dataset);

For example Worker__c stud = Worker__c.getValues('Mark');

To fetch values for hierarchy custom settings, we use the methods below to achieve the same:

We use getOrgDefaults() method to return the data set records for the company i.e 

CustomApiName var = CustomApiName.getOrgDefaults();

We use getInstance(input the user id or the profile id) method to get data records for a certain user or profile details i.e

CustomApiName var = CustomApiName.getInstance(userId/ProfileId);

We use the getInstance() method to get the records for the logged users.

CustomApiName var = CustomApiName.getInstance();

Limitations of Custom Settings in Salesforce?

Some of the limitations of using Salesforce include:

  • Each custom setting can only handle 300 fields. If there are more than 300, they can’t support more than 300 fields.
  • When storing the cached data, the storage will depend on the licenses. For 1 MB, you get the multiplication by using the licenses each organization owns. For example, a company can support up to 4MB of storage if it uses four licenses.
  • When you want to access an undeleted custom setting, you will get an error if you don’t have permission to access the custom settings. 
  • There is no option to share the custom setting records and objects.
  • When creating the custom setting, you cannot get the ownership after its creation.
  • When dealing with each certified package, one gets a separate limit when working with the company limit.

Click here to get frequently asked Salesforce Interview Questions & Answers

Salesforce Training

Weekday / Weekend Batches

 Conclusion
When creating custom settings in a distributed package, you must develop several builds for populating the custom settings with data after the package installation. Implementing custom settings is easier and straightforward and has many benefits for the users. The article has enabled you to better understand the two types of custom settings, the advantages, and how to install them in your application.

Related articles:


Source link