The Minnesota Department of Natural Resources is modernizing the way hunters and anglers procure and store licenses.
Beginning June 9, the DNR is launching the first phase of its electronic licensing system, with the fishing and hunting license module.
The new system will offer outdoor aficionados the ability to purchase their licenses through a mobile app, online, or in-person from a license agent. It will also provide customers three options to keep it on them at all times, with a paper copy, PDF or stored in the app.
“The Minnesota DNR is excited to introduce a modern licensing system designed to improve the experience for Minnesotans and visitors alike,” said DNR Commissioner Sarah Strommen, in a release. “Whether purchasing a license, permit, or registration, users will be able to enjoy hunting, fishing, and other outdoor opportunities more quickly through convenient, flexible, and user-friendly tools.”
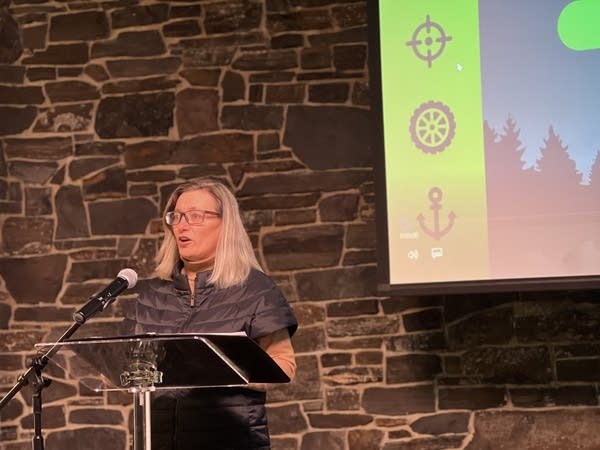
Minnesota Department of Natural Resources Commissioner Sarah Strommen says she's excited for the launch of an upgraded, mobile-friendly licensing system for the state's fishers, anglers, hunters and outdoor enthusiasts at a press conference at the DNR's office in St. Paul on April 30, 2026.
Nicole Ki | MPR News
Cell service or an internet connection is required to download the app, log in and purchase licenses, but not to store or display them.
The existing licensing system was active until just before midnight on June 1. Then the DNR began transferring all data from its 25-year-old system into the new one, including licenses purchased through the first of June. New licenses will be available starting right away June 9.
“Once the new system goes live, you'll go in and create your customer account for that first time, and when you go into your account, you'll be able to see your purchase history, you'll be able to see your license. If you want to have a paper copy, you can go ahead and print it off,” said Kelly Straka, director of the DNR Fish and Wildlife Division. “If you've already purchased your license, you're good to go, and all I can say is, I sure hope you get outside.”
While the new system is being implemented, fishing license sales have been paused from 12 a.m., June 2, through 11:59 p.m., June 8. During that time anglers may fish without a license. However, all other fishing season regulations, including bag limits, will remain in effect.
Straka said another feature that excites her about the new system will be the ability for users to link their account with friends or others in their hunting party.
“For example, if we're going to go on a fishing trip up in the Boundary Waters, and my best friend forgot to purchase their license. Well, guess what?” she said. “I can go ahead and link my account to theirs and purchase it for them, so we can absolutely enjoy those adventures.”
Straka said parents can also link their accounts to their children’s.
The fishing and hunting license module rollout is only the first phase in the DNR’s move to modernize its licensing system. Phase 2, which will be unveiled soon, will include a registration portal for recreational vehicles and watercraft titling.
Custom settings are objects that developers use to create different customized sets of data that have an association with the company, user, or profile. There are options where you can set the custom settings to either public or private. Some of the areas where custom settings get applied are the fields, Apex, flows, SOAP API, and validation rules. The data created by customer meetings must meet the user’s needs, allowing users to access it faster using the application cache.
When you have data using the settings, users do not need to use database querying languages or the Salesforce Object Query Language to get the data. It uses custom objects which developers build to fix all the business processes and information that does not work well with the Salesforce objects. Many businesses should learn how to use custom settings and benefit from them. Some of the custom fields that the developers use are currency, checkbox, phone number, date and time, URL, text, number, textarea, percent, e.t.c.
The settings can lack some fields like lookups, formulas, picklists, e.t.c. which are important to use. It also lacks page layouts that developers can use. The lack of layouts forces developers to use visual force pages to meet the requirements. When working with these settings, there are no rules that one must use.
It works with how the custom objects function. The main purpose of this custom setting is to cache all the data. It reduces the cost of the data due to easy access to the data. It makes the accessing of static data across the company easy. It eliminates the use of SOQL queries which are sometimes against the limits. What the users need to do is put the data in this type of setting without writing any SOQL for accessing the data. The data provided in the list settings does not vary according to the users or profiles, making it impossible for anyone in the company to access it.
The data is useful to different departments of the company. It enables the developers to have reusable data which everyone can access in the company. This setting is good for the type of data sets that companies use mostly in their salesforce applications.
We create a list custom settings by following the steps below:
Locate the menu and search for the Schema settings, toggle the button of Manage list custom settings to turn it on. By default, most of the settings are in hierarchy custom.
Under the Custom Setting Definition, input the names under the label and Object Name and then change the Setting type from Hierarchy to List.
When working with data like phone numbers, when you input the country codes into the labels, It automatically fetches into the form without querying the database. After filling in the details under the label and other fields, click on the Save button.
Navigate to the custom fields, click on the New button, and it will open a new page where you get prompted to choose the Data type and choose the type according to the data you entered in the custom definition. If it was phone numbers, choose the phone and click Next. We will select text.
On this page, there are several fields like Field label, length, field name, Description, e.t.c. Fill them out and click Save.
Under the created label, click on the Manage option to provide new fields.
After all, the new fields click Save, and you can view your complete list of custom settings.
Salesforce Training
Master Your Craft
Lifetime LMS & Faculty Access
24/7 online expert support
Real-world & Project Based Learning
Hierarchy Custom Settings
Hierarchy custom settings help in ensuring the majority have the advantages for users. Its logic is efficient and enables users to customize their settings using different settings and rows. The settings match particular profiles and contacts that will meet the requirements of the company’s clients. This type of setting can scan all the client companies and their necessary profiles, look at the tasks handled by different people, and ensure that the final values shown to the user are more accurate and specific to what they want.
It makes the companies make certain settings to several profile settings meant for the users, which get subjected to the user settings individually. They help the companies and their clients to define all their data hierarchically. This type of setting is suitable when defining defaults used by specific Salesforce applications, relying on the users, companies’ needs, and certain profiles. Hierarchy custom settings sync well with the Salesforce functionalities since they are highly customizable, and you can change them to meet the customer’s needs.
We can create an example of a Hierarchy Custom Setting using the steps below:
Navigate to the Custom Settings option, input the data under the Label, Object Name, Setting Type by default is a hierarchy and click on the Save button.
A new dialog box will open, and you will get prompted to choose the type of data type, select the one that matches your inputs, and Save.
Under the next step, fill in your Field Label, Length, Field Name, and Description, among others, and click on the Save option.
When the dialog opens, click on the New button to create organizational access to the data.
After saving, you will get options to add other alternatives.
Another dialog box will pop up, prompting the administrator to add the profiles that will get associated with the values. When you click the Save button, several users will be under the custom settings. And that’s the whole process of creating the hierarchy of custom settings.
How to Create Custom Settings
Log in to your Salesforce CRM, locate the Custom Settings, and several fields require one to fill. Under the label and Object name, input worker for both fields. Under the Settings section, choose between list and Hierarchy. Under Visibility, set it to public, enter the Description, then click on the Save button.
In some cases, you find that some parts of the settings section got disabled, you need to navigate to the schema settings and change the settings to enable it. Go to the custom fields and create the field by entering data into Field Label, Data type, API name, and action. To add data, hover over the Action settings to add more data.
Subscribe to our YouTube channel to get new updates..!
Why do we need Custom Settings?
Using custom settings in the Salesforce CRM and applications has several benefits. This include :
It allows faster fetching of data, for example, if you have many records and you want to retrieve one row, you will use custom settings to get the result in a short period due to the ability of customer settings to get stored in the cache.
They also avoid the chances of hitting the governing limits. There are several governing limits from SQL queries, DML statements, Sendmail methods, SOSL queries, e.t.c.
Due to the use of application cache, one can have faster data access, leading to better performance.
It enables the users to access different data according to the user’s profile and role in the organization, which promotes data integrity.
If you lack knowledge about databases or the Salesforce Object Query Language, it helps you avoid learning them.
There are several ways of fetching custom settings in Salesforce. These methods are:
To fetch custom settings, it depends on the type of custom settings. Let us look at all types of settings.
How to fetch data on list custom settings.
We use the getAll() method to fetch certain custom fields found in List settings. The method returns a list of the names and all the setting records i.e
Map var =
CustomApiName.getAll();
Eg: Map worker = Worker__c.getAll();
We use the getValues() method to fetch the values that match with a certain dataset. It normally works for both the custom settings i.e
CustomApiName var = CustomApiName.getValues(name of dataset);
For example Worker__c stud = Worker__c.getValues('Mark');
To fetch values for hierarchy custom settings, we use the methods below to achieve the same:
We use getOrgDefaults() method to return the data set records for the company i.e
CustomApiName var = CustomApiName.getOrgDefaults();
We use getInstance(input the user id or the profile id) method to get data records for a certain user or profile details i.e
CustomApiName var = CustomApiName.getInstance(userId/ProfileId);
We use the getInstance() method to get the records for the logged users.
CustomApiName var = CustomApiName.getInstance();
Limitations of Custom Settings in Salesforce?
Some of the limitations of using Salesforce include:
Each custom setting can only handle 300 fields. If there are more than 300, they can’t support more than 300 fields.
When storing the cached data, the storage will depend on the licenses. For 1 MB, you get the multiplication by using the licenses each organization owns. For example, a company can support up to 4MB of storage if it uses four licenses.
When you want to access an undeleted custom setting, you will get an error if you don’t have permission to access the custom settings.
There is no option to share the custom setting records and objects.
When creating the custom setting, you cannot get the ownership after its creation.
When dealing with each certified package, one gets a separate limit when working with the company limit.
Conclusion When creating custom settings in a distributed package, you must develop several builds for populating the custom settings with data after the package installation. Implementing custom settings is easier and straightforward and has many benefits for the users. The article has enabled you to better understand the two types of custom settings, the advantages, and how to install them in your application.
To provide the best experiences, we use technologies like cookies to store and/or access device information. Consenting to these technologies will allow us to process data such as browsing behavior or unique IDs on this site. Not consenting or withdrawing consent, may adversely affect certain features and functions.
Functional
Always active
The technical storage or access is strictly necessary for the legitimate purpose of enabling the use of a specific service explicitly requested by the subscriber or user, or for the sole purpose of carrying out the transmission of a communication over an electronic communications network.
Preferences
The technical storage or access is necessary for the legitimate purpose of storing preferences that are not requested by the subscriber or user.
Statistics
The technical storage or access that is used exclusively for statistical purposes.The technical storage or access that is used exclusively for anonymous statistical purposes. Without a subpoena, voluntary compliance on the part of your Internet Service Provider, or additional records from a third party, information stored or retrieved for this purpose alone cannot usually be used to identify you.
Marketing
The technical storage or access is required to create user profiles to send advertising, or to track the user on a website or across several websites for similar marketing purposes.