SCCM Client Installation | How To Install Configuration Manager


SCCM Client Installation – Table of Content

Introduction to SCCM

Microsoft System Center Configuration Manager (SCCM), a modern product from Microsoft, is designed to streamline the management and updating of software products. SCCM stands out for its highly adaptable, automated approach to deploying and configuring various devices, including desktops and laptops, starting from any initial state, such as bare-metal deployments. This tool empowers IT admins by offering an end-to-end solution for Windows installation and configuration. It simplifies the delivery of apps, patches, and security updates through a unified distribution system. 

A standout feature of SCCM is its capacity to manage many computers running various OS like Windows, Linux, UNIX, and iOS, demonstrating its versatility in diverse IT environments.

Get ahead in your career by learning SCCM through hkrtrainings Microsoft SCCM Online Course

SCCM Client Installation

SCCM: Installation Guide

The installation process for SCCM 2012 R2 is outlined in a series of steps crafted to simplify the user experience. The process begins with setting up the primary server and accompanying SQL server, typically housed on the same device.

Step1: Prepare active directory for configuration manager

a) Create the system management container:

Please navigate to the domain controller, load the ADSI file, and edit it. In the system OU, create a new object named ‘System Management.’

Complete the wizard, closing the ADSI editor. Grant control of the system to the configuration system server for the new system configurator object.

Create the system management container

Choose the container and click next.

container

Enter the name of system management and click next

system management

b)Complete the wizard browser and close the ADSI editor.

Now pass the system control to the configuration system server to the newly created system configurator object, this can be done by using the navigation, choose the folder -> existing object -> create the new objects.

wizard browser

ADSI

Check all the boxes (use the right tick) and complete the browser wizard.

Step2: Extend the system configuration Schema:

Navigate to \SMSSetup\bin\x64, accessing the folder controlling the system schema rules. Ensure the account used is a member of the AD admins’ group. Run Extadsch.exe as an admin and verify the successful extension in the Extadsch.log file.

system configuration Schema

Log into Extadsch.log file-> it will take you to the root, C: Drive. Check for the entry then you will notify with a message as “successfully extended to the active schema director”.

<02-02-2013 23:21:22=””> successfully extended the schema directory.

To check the activity of extadsch.exe -> go to the directory file “ConfigMgr_ad_schema.idf” that is located in the same folder in the system.

Step 3: Install the Site server prerequisites:

Essential SCCM site server management components include BITS, Remote Differential Compression, .NET Framework 3.5, and IIS components.

a. BITS

b. Access the remote differential compression

c. .NET framework 3.5

d. IIS components.

Step 4: Install the window assessments and Deploy kits (Windows ADK):

Download ADK 8.1 and follow the installation steps, including running the adksetup.exe file, accepting licenses, and choosing components like User State Migration Tools and Windows Deployment Tools.

a. Run the executable file adksetup.exe file -> accept the license agreements -> it will download and install the.Net framework 4.5.

Install the window assessments

Now restart the system when you accessed,

restart

If you have any doubts on SCCM, then get them clarified from SCCM Industry experts on our SCCM Tutorial !

SCCM Training

  • Master Your Craft
  • Lifetime LMS & Faculty Access
  • 24/7 online expert support
  • Real-world & Project Based Learning

After that system setup will resume-> accept the default location-> click next.

system setup

Select to join the CEIP -> click next

join the CEIP

Now accept the license agreements

Install the component and click the “install” button

  • User state migration tools
  • Windows deployment tools
  • Windows pre installment environment (windows PE).

install

installl

Once they complete the installation and click close.

installation and click close

HKR Trainings Logo

Subscribe to our YouTube channel to get new updates..!

Step 5: Install the SQL server:

For the SCCM database, install SQL Server 2012 by running the setup.exe file and following the installation wizard.

Run the executable file -> setup.exe

Install stand-alone SQL database server

Install the SQL server

Click OK-> it will open the new browser;

open the new browser

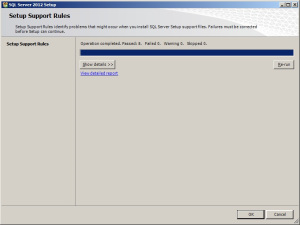
Install the product key -> run in evaluation mode -> click next

product key

Accept the SQL license agreement -> click next -> add any product updates-> click next -> now it’s time to choose the installation features -> click next

                                   Check out here for frequently asked  SCCM Interview Questions & Answers

Set SQL to run with adding an appropriate domain name, network service, and local system account.

Step6: Install the SCCM R12:

Execute the splash.hta file and follow the guided installation process. It includes selecting the primary site installation, entering the license key, and configuring SQL database server settings.

1. Run the splash.hta -> click install

Install the SCCM R12

Now click next

click next

Choose to install the primary site-> click next

primary site

Enter the license key->click next

Now accept the license key -> click next

license key

SCCM Training

Weekday / Weekend Batches

 Accept the pre-required license agreement->click next

 license agreement

Create any file solder to store the installation updates and Store the SCCM executable file in any folder-> click next

SCCM executable file

Updates will download -> installation begins-> select any language for the SCCM server-> click next.

Choose any client language-> click next-> enter the 3 digit site code and add the description.

Choose to run SCCM installation as a stand-alone -> click next

SCCM installation as a stand-alone

Click yes to accept -> select the default database server configuration-> click next.

Now specify the path to store the SQL database server and log files-> click next to set the current server -> set the configure the communication on each site system role”-> next install both MP and DP -> site server -> SCCM will begin the installation-> close the browser when it completes.

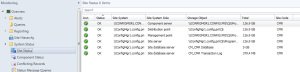
Launch the SCCM console -> make sure that all the database entries you have done are right -> start monitoring the workspace -> site status.

Launch the SCCM console

This finishes the installation process of SCCM.

Functionalities of SCCM:

The updated version of SCCM software adds much functionality to the applications. Let me explain them one by one;

Site infrastructure:

Supports Microsoft Office 365 file updates and features keyboard shortcuts for easy navigation within the configuration manager.Under the site infrastructure we can see the following features;

  • Site infrastructure’s client peer cache will support the updating of files for Microsoft office 365 and distributed express installed files for configuration of Microsoft Windows 10.
  • With the addition to this, there are few functionalities available such as,
  1. Ctrl + D -> this keyword indicates the detailed panel
  2. Ctrl +I -> this keyword indicates the breadcrumb bar
  3. Ctrl + L -> this keyword indicates the search field
  4. Ctrl + M -> this keyword indicates the main central panel
  5. Ctrl + T -> this indicates the top node in the navigation panel.
  • This central administration site and primary configuration sites both include the configuration manager updates. Rest tolls will be used for downloading or replicating problems.
  • With the help of this update, the configuration console manager can be measured and display them on the user interface applications.

Related article : SCCM Deployment

Compliance settings:

Include various device settings adjustments, such as password encryption, name modification, and storage settings.

The settings are as follows;

  • Password -> device encryption
  • Device ->
  1. Modification of device name
  2. Modification of region settings (only desktops)
  3. Language setting modifications
  4. Modification of power and sleep settings
  5. Modification of system time and language settings
  • Storage -> it uses only the private storage
  1. Auto-update available for the apps
  2. Available store-oriented app launch
Application management:

It facilitates script deployment for client device management, including PowerShell script integration and result analysis.In this application management configuration setting, users can deploy the scripts to manage the client devices in the form of packages and programming codes. The following actions included are,

  • Users can run the script on-premises managed windows and windows client PCs.Here no need to deploy the scripts, they only run in real-time client devices.
  • Importing of PowerShell scripts to the system configuration manager
  • Edit the whole script from the system configuration console.
  • Need to mark the scripts whether it is approved or denied
  • Finally, examine the results which will return the script in the configuration manager console.
Operating system deployment:
  • Collapsible task sequence groups: this deployment version will expand and collapse the task management, sequence groups. Here user can expand or collapse all the groups or individual groups at once.
  • Hardware inventory collects the secured boot information: this hardware inventory collects information such as client enabled boot data. This information will be stored in the SMS_firmware class and enabled in the hardware inventory by default.

Software updates

Improvements to express the update download time:

Features improvements in express update download times, Microsoft Surface driver updates management and configurations for Windows Update for Business deferral policies.

Manage Microsoft Surface driver updates:

Here user can use the configuration manager to manage any Microsoft software driver updates.

Configure Windows Update for Business deferral policies:

Now you can configure the whole deferral policies for windows 10 quality features and also quality updates for the windows 10 software devices. This will manages the windows updates directly which will be used for the business later. You can manage the business referral policies in any newly updated system as follows; Software library -> Windows 10 servicing.

Improved user notifications for Microsoft office 365 Updates:

Improvements will be made to leverage the Microsoft office click-to-run user experience when a client installs new office 365b software updates. This update should consist of pop-up and in-app notifications.

Reporting:

Integrates with Windows Analytics for insights into the software environment.

Using windows Analytics with configuration manager:

Windows analytics is nothing but a collection of solutions that run on the Microsoft operational management suite. This solution allows users to form any kind of insight into the current state of the software environment. Devices in the software environment also report the telemetry data. The data can be accessed through the operations management suite web portals.

Mobile device management:

Updates to Android devices for work-sharing configuration management:

Includes updates for Android work profile settings and enrollment restrictions for Android and iOS devices.

Android and IOS enrollment restrictions:

Here users can be allowed to specify the enrollment in any personal Android or IOS devices. With the Android devices, there is a limit restriction on enrollment but with the IOS devices, users can easily block the enrollment with the help of Apple device enrollment settings.

Protect devices:

Newly software update includes the specific trust files and data folders options in Device Guard policy settings. And also advanced capabilities are added to this device guard policy management.

Advantages of SCCM:

There are a lot of advantages of using SCCM, let me explain them one by one,

  • Empowers User Productivity: It allows users to access necessary devices and applications while ensuring corporate compliance and control.
  • Unified Infrastructure: It offers a single platform for managing physical, virtual, and mobile devices.
  • Efficient Change and Configuration Management: It provides tools for seamlessly managing software changes and configurations on the Microsoft platform.
  • Rapid Software and Update Deployment: It facilitates quick and cost-effective distribution of software apps and updates, including security patches.
  • Comprehensive Hardware and Software Inventory Management: It streamlines hardware and software inventory collection and management.
  • Operating System Deployment: It supports efficient deployment of operating systems across various devices.
  • Software Usage Metering: It monitors and reports software usage, aiding and resource management.
  • Affordable IT Management Solution: It offers a cost-effective solution for comprehensive IT management.
  • Database Growth Tracking: Enables monitoring of SQL Server database growth for optimized database management.
  • Remote Computer Control: It allows remote control of computers for troubleshooting and support.
  • Enhanced IT Environment Visibility: It provides greater insight into the IT infrastructure, improving decision-making and management.

Conclusion

In this blog, I have tried my best to explain the key factors involved in installing SCCM software and its advantage. SCCM is a popular Microsoft product; SCCM is used to update system management. The complete SCCM installation guide enables you to become a master in this. This blog may help a few of those who are Windows server professionals, and also for Microsoft social community forums.

Related articles:


Source link

Leave a Reply

Subscribe to Our Newsletter

Get our latest articles delivered straight to your inbox. No spam, we promise.

Recent Reviews


Salesforce Training

  • Master Your Craft
  • Lifetime LMS & Faculty Access
  • 24/7 online expert support
  • Real-world & Project Based Learning

Who can use the Salesforce Lightning Design System?

The Salesforce Lightning Design System gives you everything you need to develop user interfaces that follow Salesforce Lightning’s concepts, design style, and practice guidelines. Developers may concentrate on app logic instead of pixels, whereas developers could concentrate on customer experience, interfaces, and workflows. The website offers a variety of services for developers and designers, including:

  • Component markup that is both meaningful and accessible.
  • CSS that is cross-browser compatible.
  • Design guidelines, icons, and fonts

The three users are as follows:

Developers

  • Make sure you’re familiar with the ones that follow:
  • Have a quick rundown of the Markup and Style rules, along with the CSS class naming practices.
  • Examine the Components; for each offers semantically valid and readily available markup and documentation.

Take a look at the platform-specific setup instructions beneath.

Designers 
Begin with the following:

  • Learn about the Salesforce product development patterns and concepts by looking through the Guidelines.
  • Examine the Components section to become familiar with the current components that you can use in your projects.

Design Guidelines

The Lightning Design System is based on the Salesforce product’s designs and components. While creating applications and solutions inside the Salesforce ecosystem, such designs and elements could provide specific language and uniform appearance and experience.

Design Concepts:

When we make design choices at Salesforce, we always keep those key points into consideration, and also inspire you to do the same.

  • Clarity: Get rid of any ambiguity. Allow individuals to confidently perceive, comprehend, and act.
  • Efficiencies: Simplify and improve workflows. Predict requirements wisely to help individuals perform better, wiser, and quicker.
  • Employing the very same approach to a certain situation creates familiarity and strengthens instinct.
  • Beauty: By deliberate and exquisite craftsmanship, show respect for a person’s attention and time.

Lightning

In Lightning, begin using the Lightning Design System. Kindly give particular attention to the criteria for such Lightning technology you’re using:

  • Stand-alone Lightning app
  • Salesforce1 
  • Visualforce Lightning Components
  • Lightning Experience
  • Lightning Out component.

Want to gain knowledge in Design Patterns? Then visit here to learn Design Patterns Training!

What are the lightning components in Salesforce? 

There’s a great deal of discussion nowadays about Salesforce Lightning Components being used in Salesforce App solutions. Salesforce administrators use such components to build mono web apps that have an end-to-end encounter for just a variety of roles on the system. It’s important to keep in mind that:

  • Lightning components has end .cmp extensions.
  • Web components seem to be the foundation for Lightning components.
  • The Salesforce lightning application is installed with Apex, HTML,  JavaScript, and CSS.

Salesforce Lightning and Lightning Components were developed in response to the growing demand for mobile devices and fully responsive website development. There are three different types of Lightning Components you should know about. They are – 


Standard Lighting Components: 

These are pre-installed in the templates of the salesforce object pages. You could prefer to cover them or not use them, however, you can’t take advantage of them. It’s for this reason that they’re known as Standard Lighting Components. Each edition has been added to the list of Standard Lightning Components. The types accessible in Salesforce’s Lightning App Builder are determined by the Page Type and Object you choose. An App Page, for example, has the fewest Standard Lightning Components whereas a Record Page has the most. Certain Standard Components, like Tabs and linked Lists, serve as containers for many other Page Components.

Custom Developed Lighting Components: 

All of those are advanced lightning components that are created to meet the organization’s specific requirements. Custom Lightning Components can be developed by somebody with development expertise. This enables us to search and format information in Salesforce in new ways, draw information from external platforms for presentation, and develop custom functions in a system. Designers test and validate Components in a Sandbox or a Developer Org. When the Component is ready, a programmer elevates it to Production so it can be used in a Lightning Page.

AppExchange Lightning Components:

Most of the elements you’ll require may already be constructed and accessible on the AppExchange platform. All you have to do now is install them and then drag – and – drop them into the area where you wish to use them. Custom Managed Lightning Components can be created by Salesforce and its partners. These components are available for download and installation on Salesforce’s AppExchange. There are about 200 Components accessible on the AppExchange until this type, with 160 of them being free. Catalogs, grid layouts for Related Lists, or maps are common among some of the free ones. There are indeed several that give you access to third-party systems like Box, Vidyard,  DocuSign, TaskRay, and others. Whereas the paid listing of Lightning Components remains currently limited, it will keep growing as Lightning becomes more widely adopted. Here’s an example of a free component named USA Heatmap included in an account page.

 , Cloud Computings, salesforce-lightning-design-system-description-0, Cloud Computings, salesforce-lightning-design-system-description-0, , Cloud Computings, salesforce-lightning-design-system-description-0, AppExchange Lightning Components, Cloud Computings, salesforce-lightning-design-system-description-1, Cloud Computings, salesforce-lightning-design-system-description-1

Considerations for Components

Lightning Components have diverse attributes and could be rendered conditionally displayed on the page, which are two crucial concerns. Tap on an item in the Lightning App Builder to view its Data from an existing to the right. Filters can also be applied to control the component’s presentation related to data contents in the Record. As example, we could opt to reveal the Component solely to clients while hiding it from buyers and partners. To do the same, go to Set Component Visibility and select Add Filter. The Account Type element is then used to declare that the Component should only be visible to Customers.  Additional thing to keep in mind is that many Components could be placed in the same Lightning page template slot.

, Cloud Computings, salesforce-lightning-design-system-description-0, Cloud Computings, salesforce-lightning-design-system-description-0, , Cloud Computings, salesforce-lightning-design-system-description-0, AppExchange Lightning Components, Cloud Computings, salesforce-lightning-design-system-description-1, Cloud Computings, salesforce-lightning-design-system-description-1, , Cloud Computings, salesforce-lightning-design-system-description-0, AppExchange Lightning Components, Cloud Computings, salesforce-lightning-design-system-description-1, Considerations for Components, Cloud Computings, salesforce-lightning-design-system-description-2, Cloud Computings, salesforce-lightning-design-system-description-2

Click here to get frequently asked Salesforce interview questions & answers

, Cloud Computings, salesforce-lightning-design-system-description-0, Cloud Computings, salesforce-lightning-design-system-description-0, , Cloud Computings, salesforce-lightning-design-system-description-0, AppExchange Lightning Components, Cloud Computings, salesforce-lightning-design-system-description-1, Cloud Computings, salesforce-lightning-design-system-description-1, , Cloud Computings, salesforce-lightning-design-system-description-0, AppExchange Lightning Components, Cloud Computings, salesforce-lightning-design-system-description-1, Considerations for Components, Cloud Computings, salesforce-lightning-design-system-description-2, Cloud Computings, salesforce-lightning-design-system-description-2, , Cloud Computings, salesforce-lightning-design-system-description-0, AppExchange Lightning Components, Cloud Computings, salesforce-lightning-design-system-description-1, Considerations for Components, Cloud Computings, salesforce-lightning-design-system-description-2, , Cloud Computings, salesforce-lightning-design-system-description-3, Cloud Computings, salesforce-lightning-design-system-description-3

Subscribe to our YouTube channel to get new updates..!

Components 

Components seem to be the application’s self-contained, replaceable units. These are reusable pieces of the user interface that can be as small as a single line of text or as large as a full app. A collection of prebuilt components is incorporated within the framework. Inside an application, you could combine and adjust components to create new ones. Components are displayed in the browser to create HTML DOM elements. HTML, CSS, JavaScript, or other Web-enabled code could be included in a component. This allows you to create apps with advanced user interfaces. The specifics of a component are contained. This lets the component’s user to concentrate on developing their application, whereas the author of the component can experiment and implement modifications without disrupting users. The named properties that components reveal in their definition are used to configure them. Responding to or broadcasting events allows components to interact with their surroundings.

Lightning Component Framework

The Lightning Component framework’s functional units are called components. A component is a flexible and presumably reusable UI piece that can be as small as a single line of text or as large as an entire program. This is a Lightning Platform framework for creating single-page apps with a flexible, adaptable User Interface. 

Creating Components

  • In the Developer Console, build Lightning Components.

The Developer Console is a built-in tool that allows you to create new Lightning components and other packages as well as edit existing ones.

Component resources include a.cmp suffix and contain markup. The markup might include text or links to certain other components, as well as provide metadata for the component.

A component bundle is a collection of resources that includes a component or an application.

Component IDs  In JavaScript, you can obtain a component by using its local ID. A universal ID could be beneficial for debugging or distinguishing between several instances of a component.

The framework treats an HTML tag as a first-class component. Each HTML tag is converted into a component, giving the same liberties and facilities as other components.

CSS is used to style the components.

In Apex, component attributes are similar to member variables on a class. They are specified fields that are established on a particular example of a component and could be retrieved through the use of an expression syntax from inside component’s HTML. You can use attributes to create elements more flexible.

  • Composition of components

You may create highly intriguing components and apps by combining perfectly alright components in a bigger component.  Every component’s root-level tag is called the component body. 

Any Aura attribute is referred to as a facet.

  • Component[]. A facet is something like the body attribute.
  • Conditional Markup Best Practices

To conditionally show markup, use the tag. You can also use JavaScript logic to dynamically modify markup. While designing components, keep in mind the cost of functionality and also the manageability of the code. Your optimal design option is determined by your use case.

Component versioning allows you to express dependencies on certain revisions of a managed package that has been installed.

  • Putting Expressions to Work

Within component markup, phrases attempt to perform computations and retrieve property prices and other data. Use expressions to generate dynamic output or to send values to components via attributes.

The Label is a text which displays data about the user interface in places like the headers (1), input boxes (2), and buttons (3). (3). While you can define labels using text variables in components markup, you could also use the $Label worldwide value providers in expression syntax to obtain labels maintained beyond your code.

In input and output components, the framework supports client-side localization.

  •  Versioning of individual components

You can indicate dependencies on individual components by using component versioning. Documentation for your components aids others in comprehending and using them.

The Lightning Component framework is depicted in the diagram below. There are three parts to this:

  • Client-side: JavaScript is in charge of this.
  • Salesforce Cloud is used to link both the server and the client.
  • Apex Controller is in charge of this on the server-side.

, Cloud Computings, salesforce-lightning-design-system-description-0, Cloud Computings, salesforce-lightning-design-system-description-0, , Cloud Computings, salesforce-lightning-design-system-description-0, AppExchange Lightning Components, Cloud Computings, salesforce-lightning-design-system-description-1, Cloud Computings, salesforce-lightning-design-system-description-1, , Cloud Computings, salesforce-lightning-design-system-description-0, AppExchange Lightning Components, Cloud Computings, salesforce-lightning-design-system-description-1, Considerations for Components, Cloud Computings, salesforce-lightning-design-system-description-2, Cloud Computings, salesforce-lightning-design-system-description-2, , Cloud Computings, salesforce-lightning-design-system-description-0, AppExchange Lightning Components, Cloud Computings, salesforce-lightning-design-system-description-1, Considerations for Components, Cloud Computings, salesforce-lightning-design-system-description-2, , Cloud Computings, salesforce-lightning-design-system-description-3, Cloud Computings, salesforce-lightning-design-system-description-3, , Cloud Computings, salesforce-lightning-design-system-description-0, AppExchange Lightning Components, Cloud Computings, salesforce-lightning-design-system-description-1, Considerations for Components, Cloud Computings, salesforce-lightning-design-system-description-2, , Cloud Computings, salesforce-lightning-design-system-description-3, Lightning Component Framework, Cloud Computings, salesforce-lightning-design-system-description-4, Cloud Computings, salesforce-lightning-design-system-description-4

Salesforce Lightning Component is based on the Aura Component, which allows for the creation of dynamic web pages with just a scalable lifecycle to facilitate the development of growth-oriented apps. Aura Components are customizable UI parts represented by reusable components. Aura Components can be used in anything from a single statement to a full application. Aura Component is the foundation for Salesforce Lightning Component. Aura Component allows for the creation of dynamic web pages using a scalable lifetime to serve growth-oriented applications. The client and browser are linked through a multi-tier divided component in Aura Component. It features a responsive web design because it is built on the Aura framework. The lightning component in this way utilizes the very same code for all computers, mobile devices, and tablets, however, display based on the screen.

Lightning strikes quickly and will not replicate its sequence in real life; similarly, the Salesforce lightning design methodology is easy to use and isn’t using a similar model with different service customers. It allows you to deliver customer service, technical expertise, and varied instances all in one place.

Lightning Component Structure

In a word, Lightning Web Components have customized HTML objects created on the front end utilizing JavaScript, HTML, and CSS, with the potential to link to Apex as a console on the backend. The best part is that you can use both Lightning Web Components & Aura Components on a very similar page. The lighting component is adaptable, dynamic, and aids in focusing on the business visualization. Both the client and server sides of the lightning component employ separate technologies: the client-side uses JavaScript and the server-side uses Apex. When you start using the lightning component framework, you’ll discover that it will have a lot of benefits. 

  • The Salesforce Lightning framework makes it easier to create and develop apps. 
  • Many Salesforce users can access and use these components.
  • All browser technologies, including CSS, HTML5, and others, are enabled by the Lightning framework.
  • It allows for more engagement between users.
  • Data was exchanged between customer and server via JSON.
  • It has reusability, as well as adaptive and appealing designs.
  • It has an appealing user interface.
  • The framework aids in the development of various apps for mobile and desktop platforms.
  • It aids in the rapid performance of applications.

How to start building lighting components?

  • To make Salesforce Lightning Components, you’ll need to do the following:
  • Go to Developer Console after logging into the Salesforce developer account.
  • Then select File, then New, after that choose Lightning Component from the File menu.
  • Give the lightning component a name and a description that you like. and then press the Save button.
  • Configure the new component with component configurations. Inside the Component Configuration section, you could choose quite as many parameters as you want.
  • To develop the component, click Submit.

Where can you use Lightning Components?

Lightning is a CRM solution that responds to customer requests for a quicker, easier application development method and more efficient cycles in between business, IT, and client. Lightning components can be used to personalize your Salesforce organization in a variety of ways. It could be used to develop self-contained applications that are shared on Salesforce. You’ll gain a better understanding of Salesforce once you learn how to use Lightning Components. 

Why we should be using the Lightning Component Framework?

An out-of-the-box set of characteristics, event-driven design, and a performance-optimized framework are among the advantages.

The following are some reasons to use the Lightning component.

Comes with a pre-installed collection of components to get you started designing apps right away. You won’t have to waste time customizing your applications for various devices because the components will do it for you.

  • The ecology in use is made up of several different elements. Develop business-ready components for Lightning Experience, Salesforce1, and Communities and give them access. The navigation menu allows Salesforce1 consumers to connect your components. Drag-and-drop components on such a Lightning Page inside the Lightning App Builder or even use Community Builder to personalize the Lightning Experiences or Communities. The AppExchange has more elements for your organization. You could also share and distribute your components with certain other users.
  • Faster and more effective performance. Provides a domain-specific consumer and stateless server architecture to handle Ui metadata and app data on the consumer side, relying on JavaScript. The user only communicates with the server when it becomes absolutely essential, such as to obtain additional metadata or information. To enhance productivity and effectiveness, the server simply provides data that the user requires. The framework communicates information between both the client and the server using JSON. It uses the server, browsers, gadgets, and networking smartly so you can concentrate just on the structure and interactivity of your apps.
  • Architecture that is based on events. For improved dissociation between components, it employs an event-driven architecture. Every component that really can observe an application event or a component event could subscribe to it.
  • Design that is both responsive and reusable. Allows members to work more quickly with out-of-the-box parts working on both desktop and mobile platforms. Using components to build an app allows for parallel design, which enhances overall production efficiency. Components are wrapped, and its internal components are kept private, but its public form is available to component users. Such tight separation allows component authors to modify core details of the implementation while shielding component users from them.
  • Cross-benefits browsability’s, Apps are designed to be responsive and give a pleasant user experience. The Lightning Component framework is compatible with the most up-to-date browser technology, including  CSS3, HTML5, and tap events.
  • The user interface is stunning.
  • Visualization is compelled.
  • More user-interactive features.

Benefits of SLDS :

SLDS offers a variety of tools to construct applications that follow Lightning Experience’s concepts, design language, & methodologies. The following are some of the advantages that could create SLDS so beneficial:

  • By enhancing existing functionality or combining it with peripheral devices, it gives a seamless experience and simplified workflows.
  • Padding and margins are not over-enforced by default.
  • It is updated frequently. Till you’re utilizing the most recent edition of SLDS, the pages will be Lightning Experience compliant.
  • The CSS foundation contains accessibility.
  • It is compatible with various CSS frameworks, such as Bootstrap.

Using SLDS to Create Visualforce Pages

Visualforce pages which could mimic the appearance of the Salesforce application can be created with the Lightning Design System (SLDS). For using SLDS, you’ll need to make a few changes to the code and memorize a few points. Visualforce programming which employs SLDS, in the most portion, functions without a hitch.

In Visualforce, utilize SLDS Icons.

The actions, customized, doctype, basic, and utility logos are available in PNG and SVG (individual and sprite map) formats in the Lightning Design System (SLDS).

Using SLDS, construct a Visualforce page for the Salesforce Mobile App.

Now let us add a Visualforce page to the mobile navigation bar which shows your frequently accessed profiles and is designed using the Lightning Design System (SLDS).

SLDS for Responsive Page Design

Responsive design is indeed a website design technique that aims to create digital user interfaces that deliver the best visual experience possible, incorporating simple reading and navigation, on such a variety of devices.

Top 20 frequently asked Design Thinking Interview Questions !

Salesforce Training

Weekday / Weekend Batches

Conclusion:

Lightning Components are simple to generate, divide, and combine with some other parts, allowing you to make extremely customizable pages. Designers can expand lightning web components, encouraging different components to be created on top of existing ones, rather than constructing distinct components all across the app.  Salesforce’s lightning component architecture benefits from the usage of HTML, CSS, Java, and other internet techniques to provide a complex user experience. This article would be helpful in making you familiar with the Lightning components and their benefits to some extent.

Related articles :


Source link