After achieving action camera success, Insta360 invaded DJI’s turf with the first mass-market panoramic drone, the Antigravity A1. It had instant appeal for drone pilots, offering 8K 360 video and features like subject tracking, obstacle detection and FPV flying.

Though beaten to the punch, DJI has responded quickly with the Avata 360, aided by its drone experience and camera tech from the new Osmo 360 action cam. It has a lot in common with its rival, but it’s safer to fly around people and offers single camera 4K footage on top of 8K 360 video.

To find out how the Avata 360 stacks up against the A1, I tested it both indoors and out, around people and even “stunt” horses. The Avata 360 isn’t perfect, but it is far more polished than its rival. As with other DJI drones of late, though, US availability remains unclear.
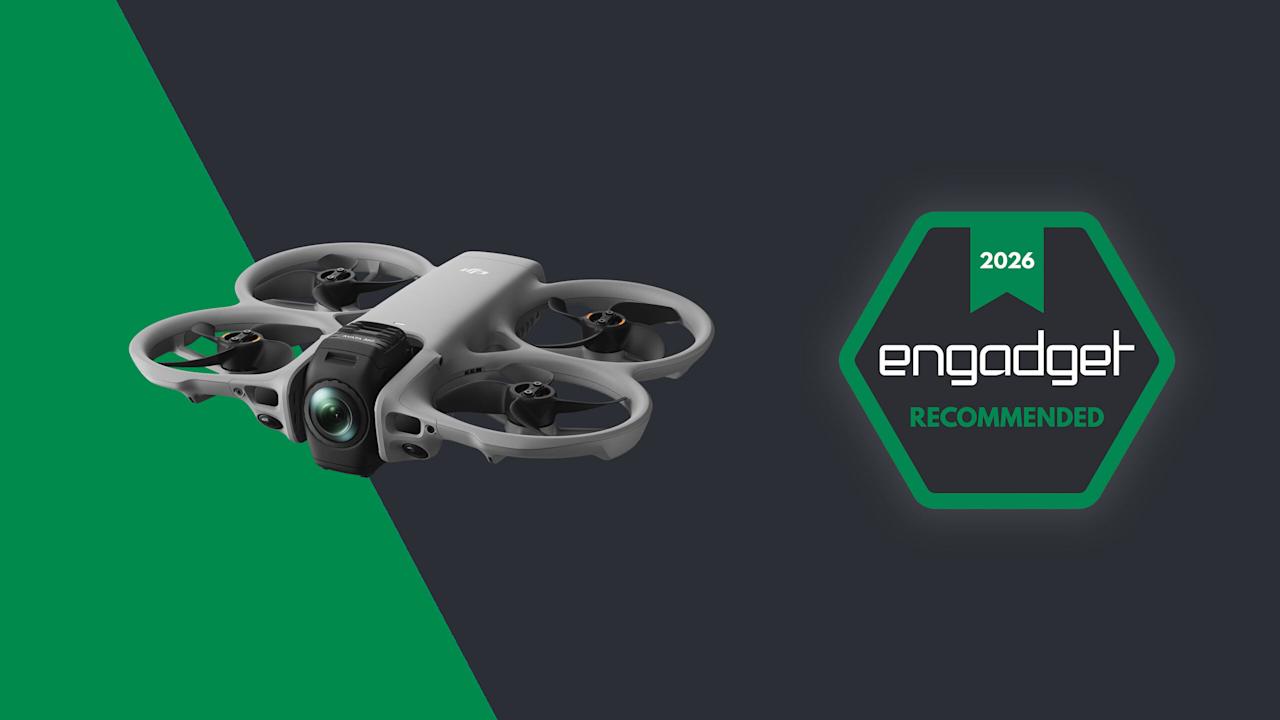
Image for the large product module

DJI/Engadget

DJI’s Avata 360 marries the company’s Avata 2 FPV drone with its Osmo 360 camera. The 360 video it shoots offers incredible flexibility in post, but overall quality is lacking compared to DJI’s other drones.

Pros

  • 8K 360 video lets you reframe shots in post
  • Excellent subject tracking and obstacle avoidance
  • People-safe propeller guards
  • Single-camera shooting available
Cons

  • 360 camera lacks video quality
  • Not great in low light
  • Single-camera mode shoots tilted video

How the Avata 360 works

The 360 camera makes the Avata 360 different from any other DJI drone. It features two ultrawide cameras with f/1.9 lenses and 1.1-inch 64-megapixel sensors, with one pointing up and the other down for unobstructed 200-degree views. Those are then stitched together by software to create 360 degree video at up to 8K 60 fps.

This setup fundamentally changes the way you pilot a drone and capture video. Since the 360 camera records everything around it, you can focus on flying and reframe shots later in DJI’s Studio app. That 360 view is also handy when piloting in FPV mode. With the head tracking on DJI’s Goggles N3, you can look all around you simply by turning your head.

Unlike the Antigravity A1 that only shoots 360 video, the Avata 360 supports regular single-camera shooting as well. When you switch to that mode, the camera rotates forward and shoots 4K video at up to 60 fps with a 28mm field of view. DJI’s drone also works with a regular controller, which isn’t an option on the A1. You have to use the Insta360’s goggles at all times.

Design

Because of the chunky 360 camera, the Avata 360 is slightly bigger than the Avata 2. It’s also quite a bit heavier at 455 grams (one pound) and so, unlike the 249-gram Antigravity A1, you’ll need a permit to fly one in most regions.

The Avata 360’s propellers are shielded to protect the drone and keep it safe indoors or around people, unlike the open-prop A1. For additional protection it has two omni obstacle sensors on the side, a Lidar sensor up front, landing sensors on the bottom and, of course, a camera that points in all directions. To keep the lenses off of bare ground, it comes with a foldable 18×18-inch landing mat.

DJI’s Goggles N3 (available with the RC Motion 3 controller as an option) are comfortable and allow you to wear eyeglasses. Unlike the Goggles 3, though, there’s no external camera to see outside. If you’d rather pilot conventionally, you can get the Avata 360 bundled with DJI’s RC 2 screen controller in another kit.

Performance and features

As an FPV drone, the Avata 360 is fast and agile. It can hit speeds up to 40 MPH in sport mode (without obstacle avoidance) or 35 MPH in normal mode. When used with the optional FPV Remote Controller 3, you can do flips, rolls and other “cinewhoop” style maneuvers. Once you get used to flying it that way, it’s incredibly fun.

The 38.7Wh batteries have 26 percent more capacity than the Avata 2’s cells, but rated endurance is about the same at 24 minutes. I never got more than about 18 minutes in real-world flying though, so it’s a good idea to buy the Fly More kit with three batteries and a fast charger that can replenish them all in about 100 minutes.

The Avata 360 can be controlled using DJI's Goggles N3 and RC Motion 3 controller in FPV mode.

Samuel Dejours for Engadget

Part of my testing of the Avata 360 was capturing “trick riding” horses, so it was important that the drone noise didn’t spook them. At 81db the Avata 360 is louder than the Mini 4 Pro (67 db) and less banshee-like than the Neo 2 due to the larger propellers, so the horses weren’t alarmed.

Video is transmitted to the Goggles N3 and RC Motion 3 controller (or the RC screen controller) at 1080p 60 fps via DJI’s OcuSync 4.0+ system. The maximum flying range is 20 km (12.4 miles), double that of the Avata 2. This is an impressive distance for an FPV drone.

The 45GB of internal storage (42GB usable) can fill up quickly when you’re shooting 8K video, but the drone also has a microSD slot. To get your footage onto a PC or smartphone, you can transfer it via the USB-C port or over Wi-Fi using DJI’s Fly app.

The Avata 360 has DJI’s usual tracking and obstacle detection features, but they’re available only with the RC 2 controller and not the Goggles N3. To follow a subject, simply draw a box around them on the controller to enable Focus Track and its three modes: Spotlight, Point of Interest and ActiveTrack. The latter tracks a subject automatically and lets you control the drone’s position via an on-screen “steering wheel.”

DJI's Avata 360 offers excellent subject tracking but with a 360 twist

Steve Dent for Engadget

To test that, I biked in a narrow forested lane and walked around a bamboo-covered obstacle course. When using Focus Track, the drone dodged most obstacles and was only confused by small leaves and branches. If it did contact one of those, it sailed right through without crashing thanks to the propeller guards.

Subject tracking works in both 360 and single camera modes, but when using the latter, The Avata 360 can’t see and avoid obstacles behind it. It contacted branches several times during my testing, but fortunately the prop guards prevented crashes. Other automatic features include Dronie, Rocket and Quickshot modes that let you capture clips for social media.

Video

The Avata 360 prioritizes FPV freedom and flexibility over pure video quality. Though the specs promise 8K, that only applies to the full 360 degree video — your final, flat video will actually be 4K or less after processing. And the 360 camera zooms digitally (not optically), which further reduces resolution. On top of that, you can often see a “seam” in the video where stitching occurs, and dewarping (used to output flat video) can create softness at the edges. With all that, video is less sharp than DJI’s regular Mini, Air and Mavic drones.

Because the camera is fixed when shooting 360 video, the Avata 360’s gimbal can’t smooth out jolts or correct for roll. Instead, it uses action cam-style electronic stabilization. What’s more, that type of smoothing causes motion blur and artifacts in low light due to the lower shutter speeds — something I also noticed with the Osmo 360.

DJI Avata 360 drone review: 360 video hits new highs

Steve Dent for Engadget

With that said, video quality was as sharp and color-accurate as the Osmo 360, and a touch better than the Antigravity A1 when filming in daylight. For tricky, contrasty conditions like a shaded path on a sunny day, the D-LogM option boosted dynamic range, helping me bring out shadow detail and tone down overly-bright highlights. However, the cityscape I shot at night was soft and occasionally blurry due to the aforementioned stabilization issues.

In exchange for this lower video quality, the 360 camera provides incredible flexibility. For a vlog style tracking shot, for instance, I usually need to film twice to show the forward and backward directions. With the Avata 360, though, I was able to get both POVs from the same shot and output an overhead view too for good measure.

DJI Studio is where you go to select your desired framing and output the flat video. It’s not quite as versatile as Insta360’s app, but it allows you to reframe shots and create smooth transitions between camera angles. And to save time, you can use the Intelligent Tracking feature to center your subject. The app also offers color correction and other features, but I found it easier to export the final shots to DaVinci Resolve for any additional work.

Flat video a mixed bag. Sharpness is mildly better than the 360 video, but the lack of a gimbal roll axis means that the camera can’t level itself when the drone banks into the wind. As a result, most of my footage was tilted and often unusable.

Wrap-up

DJI's Avata 360 offers incredible flexibility but lacks video quality compared to its other drones.

Steve Dent for Engadget

With the Avata 360, DJI has a surprisingly sophisticated drone that offers better video quality and more features than its only rival, Insta360’s Antigravity A1. It can do everything you’d expect from a DJI FPV drone like tracking, obstacle avoidance and acrobatics, while operating safely around people (or horses).

DJI also managed to undercut Insta360 on price, with the Avata 360 starting at 459 euros (approx. $530), or 939 euros ($1,089) in a kit with a screen controller, three batteries and a charger. It’s also available with the extra batteries and charger, DJI’s FPV Goggles N3 and the RC Motion 3 controller for 939 euros ($1,089). As mentioned, there’s no word yet on US pricing, but the Avata 360 has been approved by the FCC so it could appear in the US soon.

Like 360 action cams though, this is a niche product. If you’re a vlogger, extreme action shooter, FPV pilot or solo filmmaker who wants speed and flexibility, the Avata 360 is a great choice. If it’s pixel perfect image quality you want, however, you’re better off with DJI’s Mini 5 Pro, Air 3S or Avata 4 Pro drone.


Source link

Leave a Reply

Subscribe to Our Newsletter

Get our latest articles delivered straight to your inbox. No spam, we promise.

Recent Reviews


Introduction to Kali Linux:

Kali Linux is an open source system available in the Linux operating system. Nowadays, it is considered as a one of the best security Linux packages mainly used for ethical hackers. In this Kali Linux system, all the tools can be differentiated on the basis of different categories. Kali Linux is an advanced penetration testing and security auditing Linux distribution. Kali Linux is named after one of the Hindu Goddesses namely “Maa Kali”. This type of Linux system was first developed by Mati Aharoni is one of the lead Linux developers, trainers, and founders of offensive security. 

Features of Kali Linux:

The following are the important features of Kali Linux:

1. Offers complete customizations.

2. Supports multiple languages.

3. Provides vast wireless device support for multiple machines and compatible with USB devices.

4. Helps to switch from Ubuntu to Debian.

5. Easy upgrade to future versions.

Become a Linux Certified professional by learning this HKR Linux Training !

Why do people use Kali Linux?

The following are the key features of Kali Linux that will benefit the people:

1. Offers advanced penetration testing tool:

Kali Linux supports more than 500+ advanced penetration testing tools across multiple devices. The tools which are used in Linux sometimes cannot be repeated much like “Backtrack”.

2. Available as a free Linux tool:

The kali Linux system is totally free and offers better time services for multiple users. This is one of the huge factors to use this Linux system.

3. It is an open source GIT tool:

The kali Linux is an open source system and can be accessed by multiple users. All the codes which we have developed can be accessed by anyone. The open development source of Kali Linux can make an easy view to the development team.

4. Supportive tool:

Kali Linux offers hierarchical file systems, allows users to locate binaries, packages and supporting files, etc. This is also an important feature of kali Linux when compared to other Linux systems.

 Kali Linux installation and configuration guide:

In this section, we are going to explain the installation and configuration of Kali Linux:

A Back track was the older version of Kali Linux and the latest version of Kali 2016. 1 and it will be updated often.

Kali Linux installation and configuration

To install Kali Linux we have to follow these two steps:

1. Firstly, we have to download the Virtual box and then install it.

2. Then, we have to download and install the Kali Linux distribution software.

Want to know more about Linux, visit here Linux Tutorial !

Now we will discuss each step in brief:

1. Download and install the virtual box:

A virtual box is very useful when you want to test the codes in Kali Linux. Running Kali Linux codes on a Virtual box is safe and you can also know the unknown packages to test the codes.

By using the virtual box you can install Kali Linux on your device along with primary operating systems (like MAC, Windows, and Linux).

Now see the steps to download and install the virtual box:

Step1: To download the virtual box, go to the web page https: //www.virtualbox.org/wiki/Downloads. Now depending on your operating system, you need to select the right package. If you are using windows, you have to follow the below screen shot to know more,

download the virtual box

Step2: Now click on the Next button:

setup Wizard

Step 3: On the next page, you have to choose the location where you want to save the executable file. Now leave that as default and click next,

executable file

Step 4: Click Next and the following custom setup screenshot will pop up ->then select the features that you want to install -> now click the next button.

 custom setup

Step 5: Now click on yes to proceed with other installation processes.

installation processes.

Join our Embedded Systems Product Design Life Cycle Training today and enhance your skills to new heights!

Linux Certification Training

  • Master Your Craft
  • Lifetime LMS & Faculty Access
  • 24/7 online expert support
  • Real-world & Project Based Learning

Step 6: Now ready to install screen will pop up-> then click install.

install screen

Step 7: Now click on the finish button.

 finish button.

The virtual box application screen will pop up. Now we are all set to install the rest of the host file for the manual device and also recommended for professional usage.

 virtual box application

Installing Kali Linux:

We have already installed the virtual box, now move to the next stop then install Kali Linux.

Step1: It’s time to download the Kali Linux package from the Kali official web page https: //www.kali.org/downloads.

Installing Kali Linux

Step2: Now click on virtual box -> select new as shown in the following screenshot,

 click on virtual box

Step 3: Now choose the correct virtual hard disk file -> click on open.

virtual hard disk file

Want to gain knowledge in Gradle? Then visit here to learn Gradle Training!

HKR Trainings Logo

Subscribe to our YouTube channel to get new updates..!

Step 4: you can see the following screenshot, then click on the create button.

 create button.

Step 5: Now start the Kali Operating system, the default username is a root and the password is toor.

 Kali Operating system

Update the kali software:

Once you finish installing, now it’s time to update the Kali Linux and provide a newer version to get advanced functionalities. The below are the steps involved update the Kali software;

Top 30 frequently asked Linux Interview Questions !

Step1: First go to the application -> then click on terminal-> after that, type “apt-get an update”-> then update the location as shown in the following screenshot.

 Update the kali software

terminal

Step 2: Now it’s time to upgrade the applications and tools -> then type “apt-get upgrade” -> then the packages/libraries will be downloaded.

applications and tools

Step 3: The below screenshot will ask, if you want to continue -> then type “Y” and click “Enter”.

continue

Step 4: To upgrade any newer version of the Linux operating system -> then type “apt-get distupgrade”.

upgrade newer version of the Linux

Laboratory set up:

In this section, we are going to set up the testing machine to perform any test-related applications with the help of Kali Linux tools.

Step1: You need to download metasploitable (this is a Linux machine). This can be downloaded from the official web page of Linux machine Rapid7 : https: //information.rapid7.com/ metasploitabledownload.html? LS (Linux system) = 1631875 & CS = Web.

Laboratory set up

Step 2: Register by supplying the details (as shown in the above screenshot). Once you finish filling the above form, you need to download the software.

Register by supplying

Step 3: Click on the virtual box -> then select new.

he virtual box

Step 4: click on the use of an existing virtual hard disk file -> browse the appropriate file (where you have downloaded the Metasploitable -> then click on open.

 virtual hard disk file

Step 5: Then you will get a screen where you need to create a virtual machine -> click on create.

 create a virtual machine

The default username you have to give is msfadmin and the password is msfadmin.

msfadmin

Linux Certification Training

Weekday / Weekend Batches

 Is kali Linux better than Ubuntu?

The answer would be yes, Kali Linux system is better in the view of a pentester for the basic users it doesn’t require for general-purpose operations go with Ubuntu will all features. If you are in a dilemma about choosing Ubuntu software and having a thought of installing Kali Linux then there are other ways you can do it.

The following are the major points when you want to choose Kali and Ubuntu.

1. If you are looking for the operating system for network security, penetration testing, and other testing techniques, etc. Ubuntu cannot compete with the Kali Linux system.

2. If you are looking for the user –friendly, general-purpose operating system with the best GUI, Ubuntu is the best choice.

Ubuntu system is more suited for personal uses while Kali is best for Hackers, vulnerability testers and nerds, because of the tools they both come bundled with or (you can also install the same set of “Hacking” tools while installing on Ubuntu). Kali was a product of backtrack. Here all the binary packages only meant for Debian could be installed on Kali Linux and this is the power of the Kali Linux system. Kali has come with a number of penetration tools be it Wifi or any other database to be built instantly. One more point to be remembered is that Kali uses the APT for package management.

Become a Msbuild Certified professional by learning this HKR Msbuild Training! 

Conclusion:

In this blog, we have explained the complete installation guide of the Kali Linux system, and also help our audience how to use it. The blog contents have been designed to help beginners who want to start their career as a Linux developer. This blog is also helpful for penetration testing experts. Once you finish this blog, you will be able to work on the moderate level to advanced applications of the Kali Linux system. 

Related Articles:


Source link