Avianca Lifemiles Amex Elite review: Worth $249?


Choosing the right airline credit card usually comes down to how often you fly with that carrier and its partners — and Avianca’s two cards are no exception.

If you regularly book Avianca or Star Alliance award flights, it’s worth considering both the Avianca Lifemiles American Express® Card and the Avianca Lifemiles American Express® Elite Card.

The Elite Card may catch your eye with its earning rates and built-in Lifemiles+ Lite membership. However, despite its $249 annual fee (see rates and fees), it doesn’t necessarily deliver enough value to justify the cost for most travelers.

Card rating*: ⭐⭐⭐

*Card rating is based on the opinion of TPG’s editors and is not influenced by the card issuer.

Avianca Lifemiles Amex Elite: The basics

The Avianca Lifemiles Amex Elite Card looks like a step up from the cheaper $99 Avianca Lifemiles American Express Card (see rates and fees). It earns more on Avianca purchases, adds redemption perks and includes ongoing benefits through a Lifemiles+ Lite membership.

In practice, though, this card feels more like a niche option for frequent Lifemiles users than a well-rounded mid-tier airline card.

Just like the cheaper $99 version, you’ll receive Avianca Silver status, which includes:

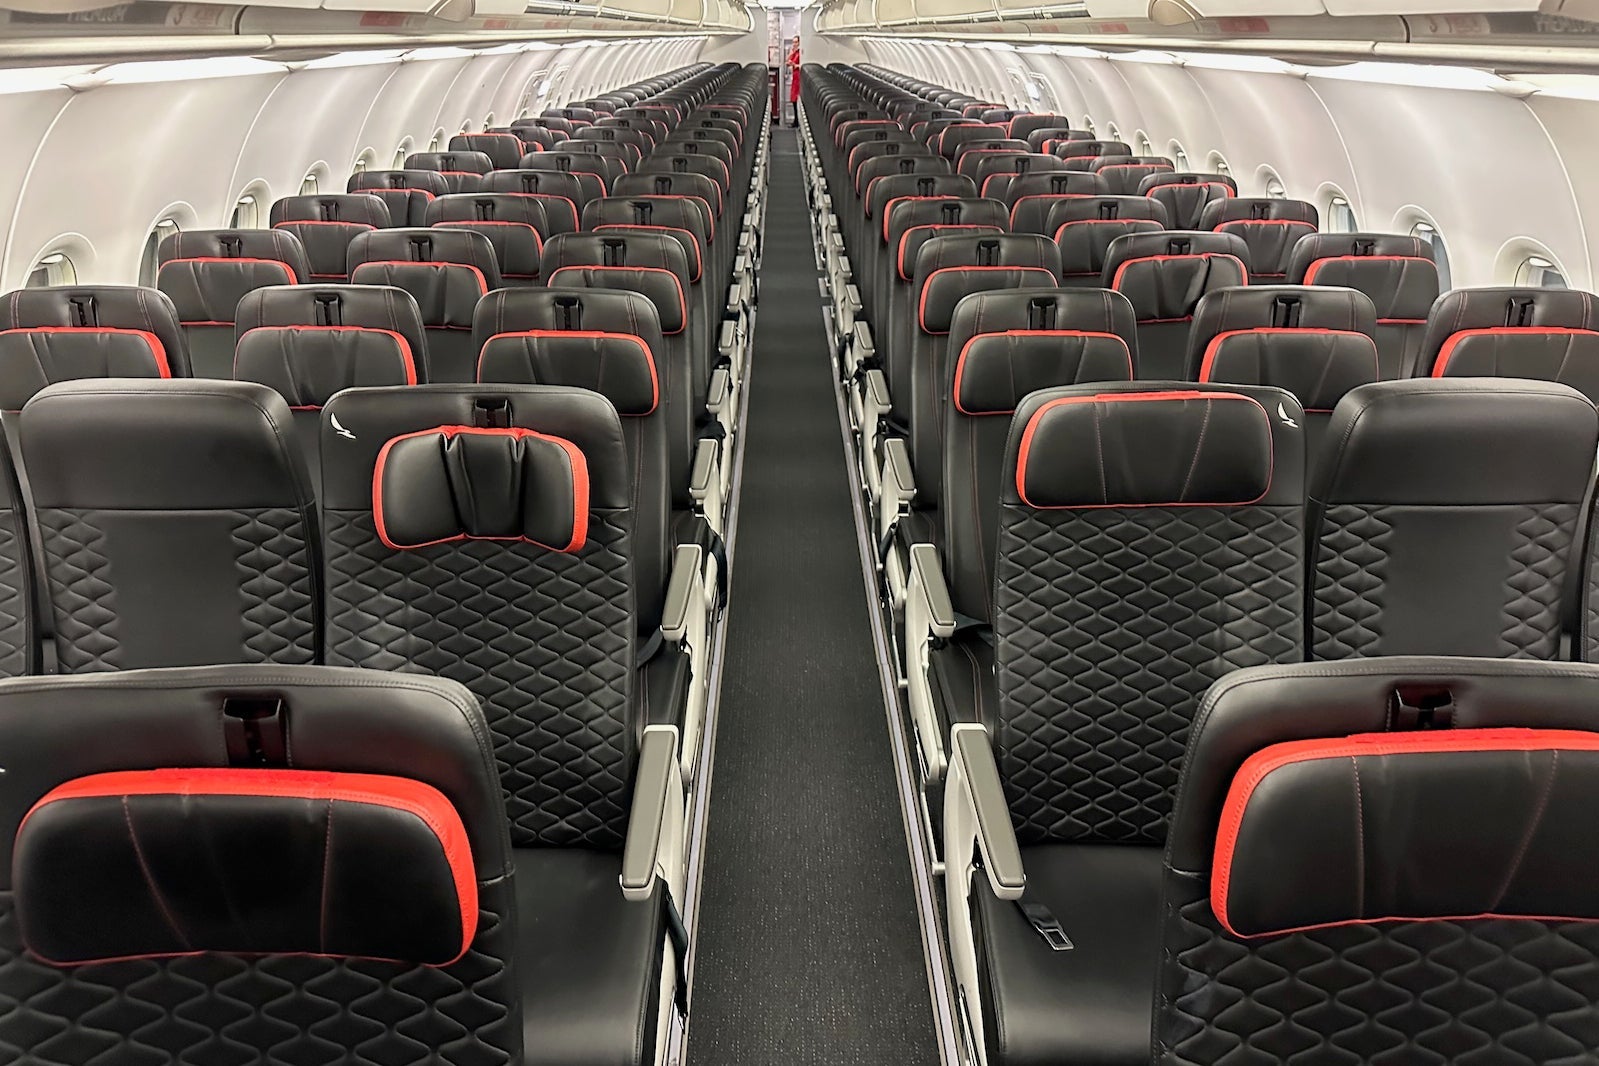
  • Avianca lounge access twice per year
  • Extra-legroom seat selection
  • Select upgrade options
  • An extra checked bag (excludes Basic and Light fares)
  • Priority check-in and boarding (Group B)

Reward your inbox with the TPG Daily newsletter

Join over 700,000 readers for breaking news, in-depth guides and exclusive deals from TPG’s experts

Avianca narrowbody plane
ZACH GRIFF/THE POINTS GUY

The Elite Card’s main differentiator is its built-in Lifemiles+ Lite membership, which offers:

  • 500 bonus miles per month (6,000 per year)
  • An up to 25% discount on Avianca award flights
  • A 10% discount on Star Alliance award redemptions

These perks can be valuable, but only if you’re actively redeeming Lifemiles.

Like the lower-fee card, there are no foreign transaction fees (see rates and fees for the Avianca Lifemiles Amex Elite; see rates and fees for the Avianca Lifemiles Amex), and the card is issued by Cardless on the American Express network.

Avianca Lifemiles Amex Elite pros and cons

Pros Cons

  • Complimentary Avianca Silver status (also available on the lower-fee Avianca Amex Card)
  • Star Alliance Silver benefits, including priority waitlist and priority standby
  • Monthly bonus miles and redemption discounts through Lifemiles+
  • Solid earning on Avianca and Lifemiles purchases
  • No foreign transaction fees

  • Same Silver status as the lower-fee card
  • Not a great fit for those who fly Avianca infrequently
  • Offers little if you already have Avianca Gold or Diamond status
  • Limited benefits when flying Star Alliance partners
  • Weak everyday earning rates
  • Benefits are highly dependent on using Lifemiles regularly

Avianca Lifemiles Amex Elite benefits

The biggest driver of value on the Avianca Lifemiles Amex Elite isn’t the elite status — it’s the Lifemiles+ Lite membership. You’ll receive 500 miles each month, which adds up to 6,000 miles per year. Based on TPG’s April 2026 valuations, that’s worth $84 per year.

That alone won’t come close to offsetting the card’s $249 annual fee, but the additional perks — particularly the 10% rebate on Star Alliance redemptions — can be meaningful if you redeem miles regularly.

There’s also an up to 25% discount on Avianca award flights, which can help stretch your miles further — though this is most useful if you’re actually flying Avianca rather than booking partner awards.

When it comes to status, Avianca Silver can be useful if you don’t already have elite status with a Star Alliance airline. You’ll get basic benefits like priority boarding and priority wait-listing.

Avianca VIP Lounge in Miami International Airport (MIA). GISELLE GOMEZ/THE POINTS GUY

You’ll receive two Avianca lounge visits per year with this card. That said, how useful this benefit is depends heavily on where you’re traveling.

For example, Avianca’s Miami International Airport (MIA) lounge is also part of the Priority Pass network, meaning you may already have access through another card. And outside of Avianca-operated lounges, you won’t get broader lounge access like you would with premium travel cards.

As with the lower-fee version, this card’s benefits are primarily tied to Avianca flights. When flying other Star Alliance airlines like United Airlines or Air Canada, the value of Silver status is fairly limited. That’s ultimately the issue — you’re paying a lot without getting meaningfully strong benefits.

How to earn and use your rewards

How to earn your rewards

The Avianca Lifemiles Amex Elite earns:

  • 3 miles per dollar spent on Avianca and Lifemiles purchases
  • 2 miles per dollar spent on dining and travel
  • 1 mile per dollar spent on everything else

These rates are fairly standard for an airline card. As is usually the case, I don’t recommend putting much everyday spending on this card. You’ll generally get more value from a transferable points card that offers greater flexibility.

That said, there is one area where this card stands out: buying Lifemiles.

Buy Lifmiles screenshot
LIFEMILES

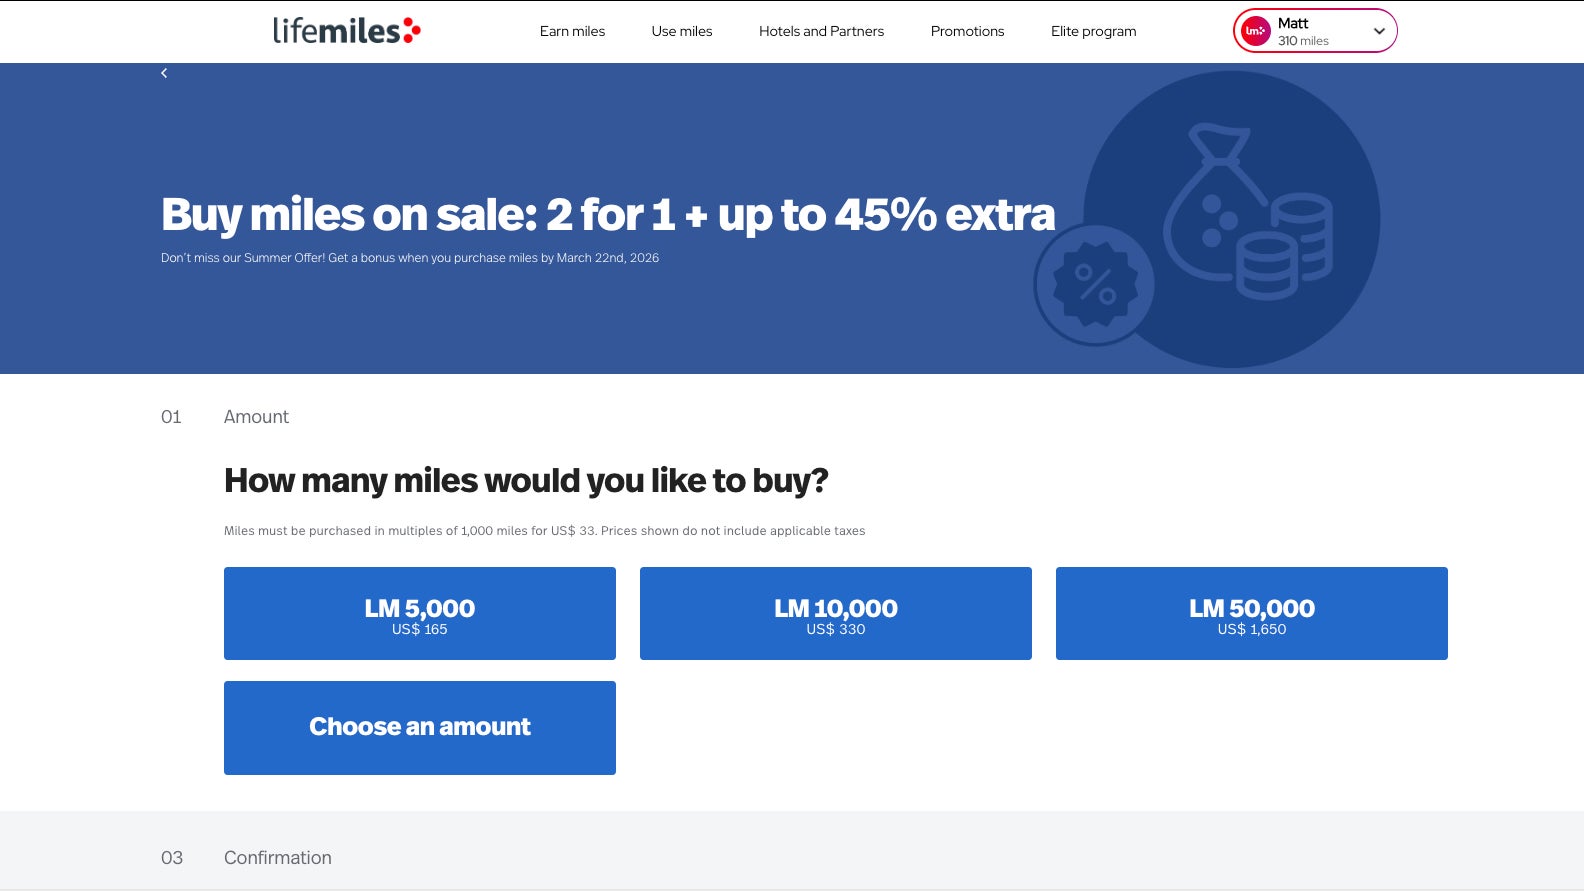
Lifemiles frequently runs promotions offering bonus miles, making it relatively easy to build a balance for premium cabin redemptions. Earning 3 miles per dollar spent on those purchases can make this card useful if you regularly top up your account.

The card also includes a “double miles” feature through Lifemiles+, which matches miles earned each statement cycle — but only up to 1,000 bonus miles per month. It’s a nice perk, though it doesn’t dramatically change the overall earning potential.

How to redeem Avianca Lifemiles

Avianca Lifemiles are most valuable when redeemed for flights on Star Alliance partners, including United, Air Canada and Lufthansa.

One of the strengths of the program is that it often offers competitive award pricing with relatively low taxes and fees, making it a strong option for booking premium cabin flights.

For example, you could fly Swiss business class from Newark to Zurich for 69,000 Lifemiles plus just $29 in taxes. (You could then use cash to upgrade to first class at check-in, like I did.)

Swiss 777 business class
Swiss business class. ETHAN STEINBERG/THE POINTS GUY

The Elite Card’s 10% rebate on Star Alliance redemptions is one of its most compelling perks and can provide ongoing value if you redeem frequently. You would save almost 7,000 Lifemiles on the flight to Switzerland highlighted above.

If you’re only redeeming occasionally, though, this perk alone is unlikely to justify the higher annual fee.

Potential drawbacks to the Avianca Lifemiles Amex Elite

The Avianca Lifemiles Amex Elite lacks several benefits that are standard on similarly priced airline cards, such as meaningful statement credits and broader lounge access. That makes it difficult to offset the annual fee — unless you’re consistently extracting value from Lifemiles redemptions.

Ultimately, you’re paying a premium price for a set of benefits that is highly dependent on how often you redeem Lifemiles — rather than a well-rounded suite of travel perks.

Avianca Lifemiles Amex Elite vs. Avianca Lifemiles Amex

While the Avianca Lifemiles Amex Elite offers incremental perks, it doesn’t meaningfully separate itself from the more affordable Avianca Lifemiles American Express.

Both cards include:

  • Avianca Silver status
  • Two lounge passes per year
  • Similar overall earning structures

The Elite Card adds:

  • 6,000 bonus miles annually (500 per month)
  • An up to 25% discount on Avianca awards
  • A 10% discount on Star Alliance redemptions
  • Higher earning on Avianca and Lifemiles purchases

Those perks can provide value, but for many travelers, they won’t justify paying an extra $150 per year — especially given the lack of additional core travel benefits.

Personally, I’d lean toward the cheaper card unless you’re consistently redeeming Lifemiles and can take advantage of the award discounts.

Is the Avianca Lifemiles Amex Elite worth it?

The Avianca Lifemiles Amex Elite‘s overlap with the cheaper Avianca Lifemiles American Express, combined with limited elite benefits and average earning rates, makes the card a difficult sell unless you’re deeply invested in the Lifemiles program.

If you regularly redeem Lifemiles, especially for premium cabin Star Alliance awards, the Elite Card can offer some incremental value. However, for most travelers, I don’t think it does enough to justify its $249 annual fee.

When to apply for the Avianca Lifemiles Amex Elite

Currently, new Avianca Lifemiles Amex Elite Card holders can earn up to 100,000 miles:

  • 60,000 miles after spending $4,500 on purchases in the first 90 days from account opening
  • An additional 40,000 miles after spending $25,000 on purchases in the first 365 days from account opening

The first portion of the bonus is fairly standard, but the second requires a very high level of spending ($2,084 per month for a year). In most cases, you’ll get better value by putting that spending on other more lucrative cards.

Woman shopping online
URBAZON/GETTY IMAGES

Keep in mind that you can only earn a welcome bonus on one Avianca card, so it’s important to choose carefully. Since the card is issued by Cardless, you won’t be subject to Amex’s once-per-lifetime welcome bonus rule.

Other cards to consider if you don’t want the Avianca Lifemiles Amex Elite

If the Avianca Lifemiles Amex Elite doesn’t seem like the right fit, consider:

For additional options, check out our list of the best travel cards.

Bottom line

The Avianca Lifemiles Amex Elite has some useful perks — particularly for frequent Lifemiles users — but it’s ultimately a niche card.

If you’re not regularly redeeming Lifemiles, it’s hard to justify the $249 annual fee. And even if you are, the cheaper Avianca card may offer better overall value.

For most travelers, this isn’t the obvious upgrade it’s positioned to be.


Apply here: Avianca Lifemiles American Express Elite Card


Source link

Leave a Reply

Subscribe to Our Newsletter

Get our latest articles delivered straight to your inbox. No spam, we promise.

Recent Reviews


Introduction to Row level Security in Power BI:

Row level security in Power BI is mainly developed to restrict the data access and also secure them. In row level security, you will get a filter that restricts the data access only at the row level. With the help of row level security in Power BI, you can also define the filters along with roles. One more point to be remembered, if you are working with the Power BI tool, you should be very careful this is due to the Power BI services and members of BI workspace need to access the datasets within their workspaces. Row level security does not restrict this type of data access. 

Row level Security in Power BI

The advantage of using this Power BI enables you to configure the row level security for data models, then import them into the Power BI tool by using the Power BI desktop. Users can also configure this type of row level security on datasets which use Direct Query programs; SQL servers, and RDBMS. With the previous version of Power BI software, you were only able to implement row level security within the On-premises data analysis service model outside the power BI software tool. To perform data analysis you need to have live connections, and the security options will never show up the live connection data sets on-premises.

Defining roles and rules in row level security in Power BI desktop:

I think this is an important task; you should define the roles and rules within the Power Business Intelligence desktop. Then you also publish the definitions of the roles. This is an important task of the row level security in Power BI to define the data security roles. To perform this type of roles and rules, we have to follow the below steps:

The steps included are:

1. First you need to import your power business intelligence desktop –> then configure the Direct Query connection.

Point to remember:  You can’t define the roles within the Power BI desktop for data analysis services using live connections. All you need to do is perform data analysis services within the analysis model.

2. Then select the Modelling tab.

3. Now you need to select the Manage Roles tab.

4. Then click on the “Create” button to create the new role.

5. It’s time to provide a name for your new role.

6. Now select the database table that you want to apply DAX rules in your database connection.

7. Users need to enter the DAX expressions. This type of expression should return a Boolean result (True or false).

For example: [Entity ID] = “value”.

Note: You should use the username () with the given expression. You should be very careful that while defining the username () consists of a format of DOMAIN username within the power Business intelligence desktop.

8. Once you have created the DAX expression-> then you need to select the Check box above the expression box to validate the Boolean expression.

Note: While defining the Boolean expression box, you have to use commas to separate the DAX functional arguments and also make use of semicolon separators.

9. Then finally click on the “Save” button.

Users can’t assign the roles within the Power Business Intelligence Desktop. Users are also able to define the dynamic security along with the Power business intelligence desktop by using the expressions like username () and userprincipalname () DAX function expression.

By default, row level security in the Power BI filter makes use of single-directional filters, and you can also set the relationships in a single-direction or bi-directional connection. You can manually make use of a bi-directional connection cross filter to select the relationship and check the “Apply row level security in both the directions” checkbox. And you have to check this box to implement dynamic row level security in BI at the server level, and where you can define the row level security is based on the user name and login ID.

Enroll in our Wireshark Training program today and elevate your skills!

Power BI Training

  • Master Your Craft
  • Lifetime LMS & Faculty Access
  • 24/7 online expert support
  • Real-world & Project Based Learning

How to validate the rules in Row level security in Power BI:

Once you are done with the creation of the role, you need to test the results of roles available within the Power Business intelligence desktop.

The following are the important steps involved to validate the rules used in Power BI:

The steps included are:

1. First you need to select the “view as roles” as shown in the below screenshot,

view as roles

In the “View as roles” tab, you can also see the roles which you have created as shown below;

rules in Row level security in Power BI

2. Now select the role which you have already created -> then click on the “OK” button to apply for the roles. Here the report renders the data relevant to define the roles.

3. Now you need to select the “other user” button -> then supply it for a given user. It’s always good to supply the user principal name (UPN) to define the Power BI service and Power BI report services use as shown below:

Power BI report services

4. Then click on the “OK” button and report the data renders based on what you can see on the Power BI desktop.

Within the power business intelligence desktop, other users (Non –users you can also say) are able to display the different results suppose if you are working with dynamic security based on the DAX Boolean expressions.

Top 50 frequently asked J2EE Interview Questions!

Business Intelligence & Analytics, power-bi-row-level-security-description-1, Business Intelligence & Analytics, power-bi-row-level-security-description-5

Subscribe to our YouTube channel to get new updates..!

How to manage row level security on your data model:

To manage the row level security on your data model, you have to follow the below steps:

The steps included are:

1. First you need to select the Ellipse (….) for the given data set.

2. Then click on the Security button. The below screenshot will explain this;

manage row level security on your data model

This will directly take you to the RLS page -> then you can add members to define the role created in your Power business desktop. Only the authorized owner of the given data set is eligible to see the security. Suppose if the dataset is available in the group, then only administrators of the group can see the security option.

You can only create or modify the row level security page on the Power BI desktop.

Working with members in row level security:

The following are the few steps included in performing this process:

1. You can add members to the roles in Power BI just by typing them in the email address, or provide the name of the user, security group details, and distribution list.

Note: you cannot add user groups that are created within the Power BI. So you should add the members external to your business organization.

The below screenshot will explain this;

Working with members in row level security

2. You can also able to see how many members are parts of the roles in a given Power BI desktop with the given role name or next to members as shown below:

Power BI desktop

Remove members from roles:

You can also remove the members just by selecting the “X” next to the user name as shown below:

Remove members from roles

Validate the role within row level security in Power BI:

To validate the roles follow the below steps:

1. First you need to select the ellipse (…) button which is next to the role.

2. Select the test data as a role as shown below:

Validate the role within row level security in Power BI

Now you can able to view the reports which are available for the role. Power BI dashboards are not presented in the view.

The below screenshot will explain this scenario:

Power BI dashboards

Enroll in our HCISPP Training program today and elevate your skills!

Power BI Training

Weekday / Weekend Batches

Conclusion:

We can say that Row level security in power business intelligence is one of the powerful security features available for both desktop and cloud services. In recent times, one more tool also developed to offer a security service that is popularly known as Microsoft Azure- a child product of Microsoft corporations. With the help of this row level, security feature users can also modify or view the data sets in connections and also enable users to create roles to perform new or modify the already existing data sets in the database. All the modified data sets will be stored in Direct Query data sets. I think we have tried to cover up all the sections which are related to Row level security in Power BI. So this blog may help a few of you to access the secured data and also protect the business data for future purposes. 


Source link