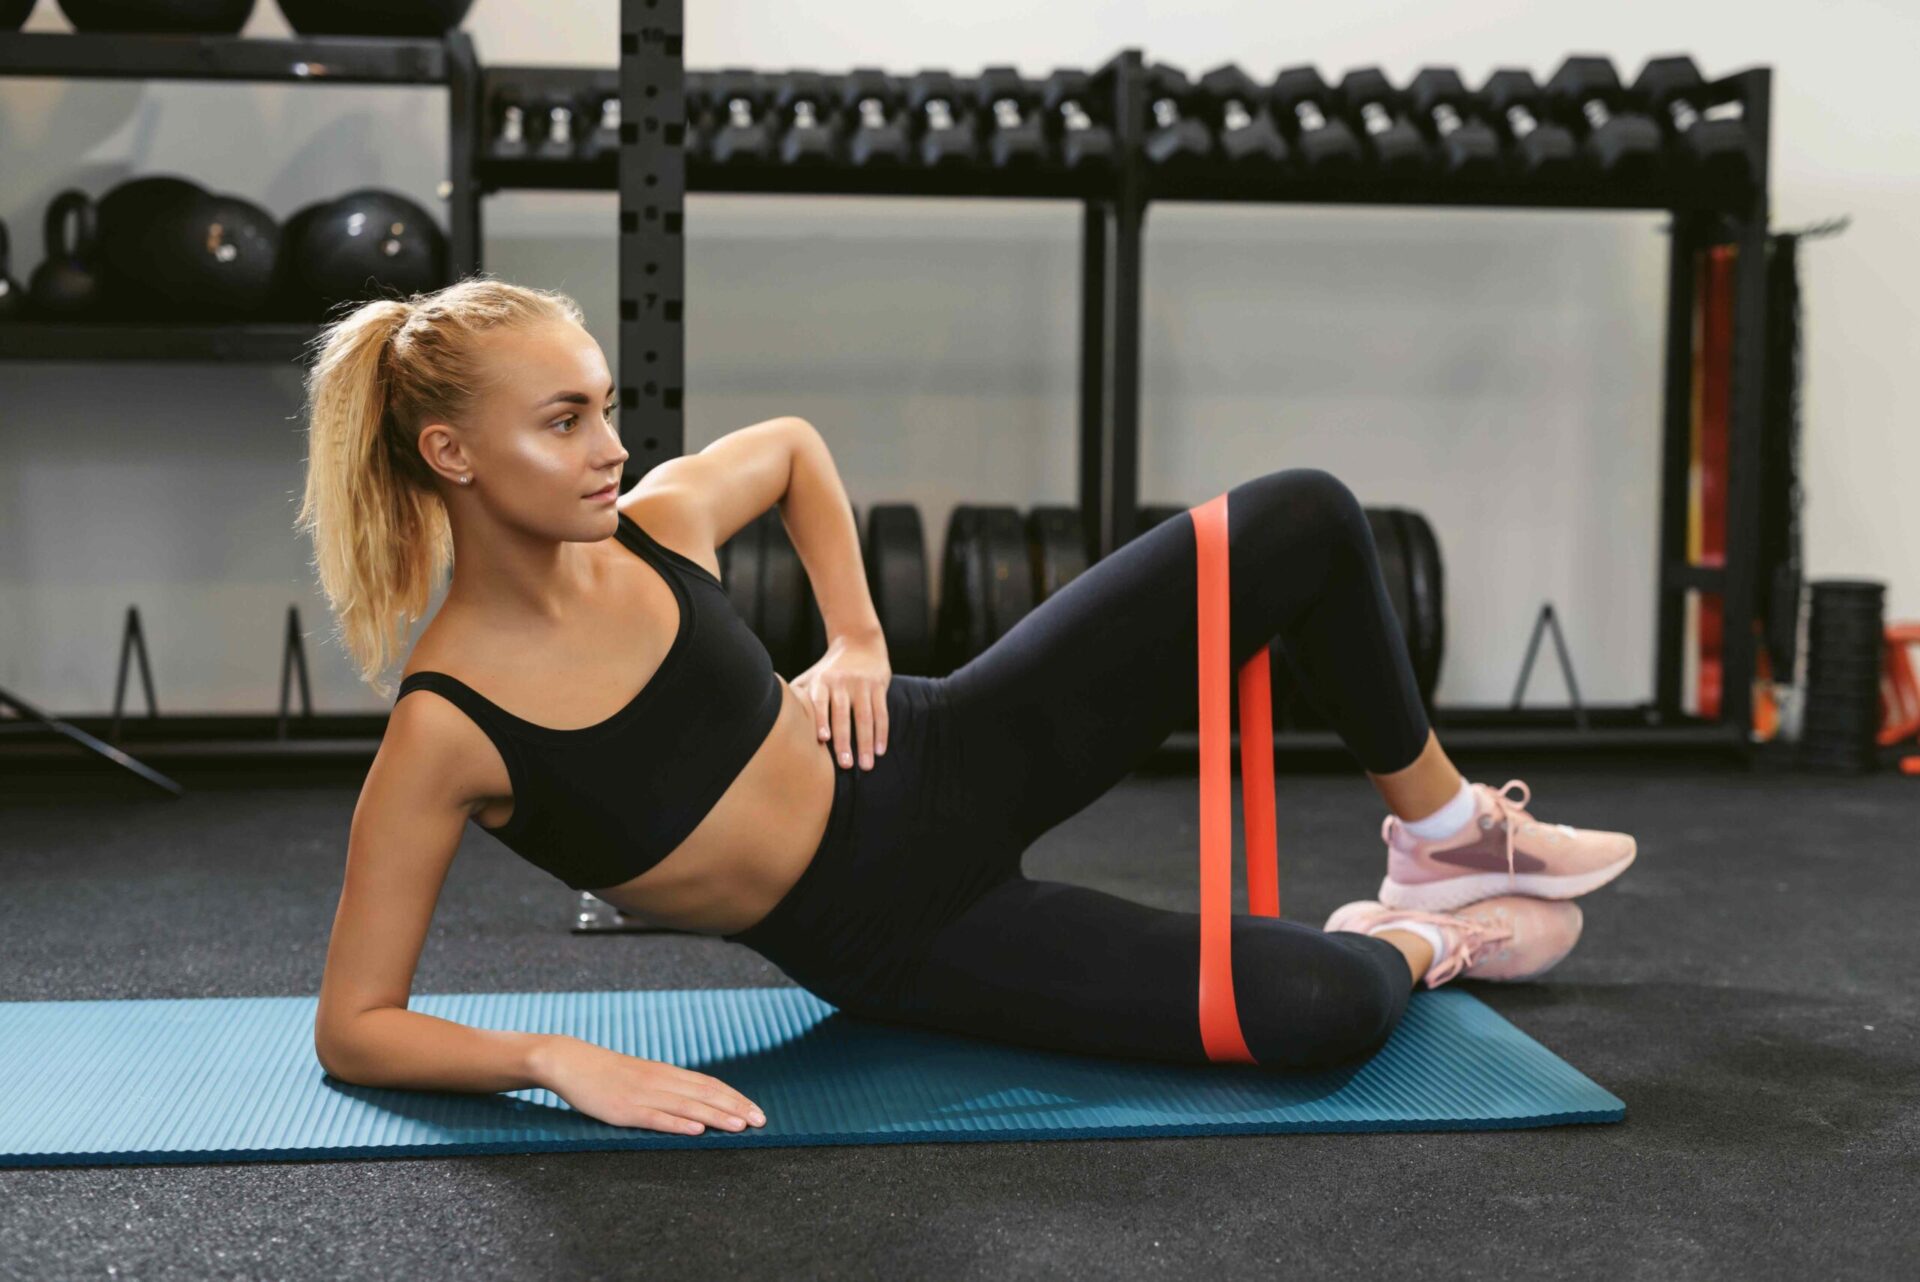
5 Simple Exercises To Strengthen Your Knees and Hips


Banded clam shells stabilize your hips and prevent your knees from collapsing inward.Credit: ANRproduction / Getty Images
Banded clam shells stabilize your hips and prevent your knees from collapsing inward.
Credit: ANRproduction / Getty Images
  • Exercises targeting the lower body can enhance the strength, stability, and mobility of your knees and hips.
  • Banded clam shells, Bulgarian split squats, and golbet squats are a few exercises that can strengthen your knees and hips.
  • Being consistent with completing the exercises is more important than where you add them into your workout schedule.

Your hips and knees are two vital joints that help you navigate daily life—they deserve the care and attention to keep them functional and strong. You can challenge both joints with a variety of exercises to enhance their strength, stability, and mobility. 

1. Banded Clam Shells

This exercise challenges a variety of hip muscles, including the gluteus medius and minimus, both of which assist with hip joint rotation. Banded clam shells help stabilize your hips and prevent your knees from collapsing inward.

Here's how to do them:

  1. Place a resistance band around the tops of your knees and lie on your side with your knees at 90 degrees.
  2. Keep your feet together and your knees parallel while you open your top knee toward the ceiling, making sure not to push your hips forward or back.
  3. Once you reach the top, pause for a second, feel the glutes contract, and then gently bring your knees back together, controlling the tension on the way down. 
  4. Complete all your reps close to failure/fatigue on one side before switching over.

2. Bulgarian Split Squats

The Bulgarian split squat is a single-legged strength exercise that targets the muscles around your hip and knee joint. It challenges a variety of muscles, the major ones being the quads and gluteus maximus. This exercise also challenges your balance and stability and helps correct any strength discrepancies between sides. To make Bulgarian split squats harder, you can hold dumbbells in each hand or by your chest. 

Here's how to do them:

  1. Place the top of your back foot at the edge of an exercise bench with your front leg on the floor and your torso facing forward.   
  2. Simultaneously bend your front knee to load the leg while bringing your back knee straight down toward the floor.
  3. Once you reach the bottom of the movement with your front hip close to 90 degrees, press through the floor with your front foot and come back up to stand before completing more reps on this side. 

3. Goblet Squats

A foundational strength move, the goblet squat trains your entire body with an emphasis on your leg muscles, the prime movers being your quads and glutes, both of which support your knee and hip joints. Choose a weight that you can hold at your chest, comfortably challenging but still allowing you to maintain good form.

Here's how to do them:

  1. Start from a standing position with your core braced and weight at your chest.
  2. Simultaneously bend your knees and hips to drop into the squat, aiming for a depth your mobility allows. 
  3. Once you reach the bottom of the squat, press through your midfoot and stand back to the starting position, keeping your core braced. 

4. Step Ups

This exercise is another single-legged variation that targets all the muscles needed for strong hips and knees. You’ll work your quads as you step up and then your glutes as your hips extend at the top. You can do step ups with or without weights; just make sure you perform the movement slowly and controlled. You can modify these by lowering the box to make it easier or raising it to make it more challenging. 

Here's how to do them:

  1. Place your front foot on the box with your torso tall and core tight. 
  2. Press through your front foot and step onto the box, keeping the front leg primarily loaded, and stand up fully at the top. 
  3. Slowly—and with control—lower yourself off the box and try to place the back foot on the ground as quietly as you can, so the front-loaded leg remains the one challenged.  

5. Hip Bridges

This one is primarily a hip exercise that targets all of your glute muscles. You can do these loaded with weights or single-legged for a greater challenge. Regardless of which variation you choose, make sure you keep your core braced and your spine neutral the entire time, as overextending the lower back is a common mistake. 

Here's how to do them:

  1. Lie on the floor with your feet planted and your hands by your side. 
  2. Now, brace your core and press your lower back into the floor.
  3. Then, push through your midfoot to raise your hips into full extension, being sure to stop before your back begins to bend.
  4. Feel your glute squeeze at the top, and then slowly come back down before completing more reps.

How To Add These to Your Routine

When it comes to training your hips and knees, you don't need to dedicate an entire day to leg training alone. You can safely add these to any day of your workout, even if it's just a few sets.

The key to gaining strength in any muscle group is consistency over time, so where you place these in your routine is less important as long as you do them throughout the week at some point. The frequency and intensity will be entirely dependent on your needs and goals.

If you need help structuring workouts that are right for your body, get in touch with a coach. 


Source link

Leave a Reply

Subscribe to Our Newsletter

Get our latest articles delivered straight to your inbox. No spam, we promise.

Recent Reviews


Azure Traffic Manager – Table of Content

What is Azure Traffic Manager?

Azure Traffic Manager distributes traffic to services across the Azure regions. It is a DNS-based traffic load balancer that provides responsiveness and high availability of the services. The Traffic Manager considers the health of all the endpoints and uses DNS to route client requests to a service endpoint based on a traffic-routing method.

A service endpoint might be an application hosted on Azure or an internet-facing application outside of Azure. To suit the needs of different applications, the Azure Traffic Manager offers several endpoint monitoring options and traffic routing methods. It balances the traffic load on services according to set policies. 

Features of Traffic Manager

Here are the features that the Traffic Manager offers.

  • The Traffic Manager continuously monitors endpoints. If, in any case, an endpoint goes down, then it provides automatic failover, which results in increased application availability.
  • The services hosted on Azure run in data centres located around the world. The traffic manager routes traffic to the endpoint with the lowest latency. This improves application responsiveness.
  • If you plan for service maintenance of your applications, then the traffic at the time of service maintenance will be routed to the next best locations, which are alternative endpoints. So, users can perform operations without downtime.
  • The Traffic Manager also supports non-Azure endpoints, which might be on-premise or on hybrid cloud scenarios. These scenarios include burst-to-cloud, migrate-to-cloud, and failover-to-cloud scenarios.
  • It provides various traffic routing methods. We can combine the routing methods to create a nested Traffic Manager profile for more complex deployments.
  • Based on user traffic volumes and patterns, it provides actionable insights. You can get a view of where the users are interacting with the application and the quality of their digital experience.
  • It adheres to the applications of data sovereignty regulations by using geographic fencing.

How does Traffic Manager work?

The key benefits of the Traffic Manager are,

  • The traffic distribution is based on one of the traffic-routing methods provided by Azure.
  • It continuously monitors the health of the endpoints and implements automatic failover.

A client connects to a service using a DNS name. The Traffic Manager will first resolve the DNS name of the service to the IP address. The client is then connected to the IP address of the service to access it. The Traffic Manager works at the DNS level, where it routes traffic to a specific endpoint based on a selected traffic routing method. It is neither a proxy nor a gateway. Clients will directly connect to the selected endpoint. The Traffic Manager will not see the data passing between the client and the service.

Become a Microsoft Azure Certified professional by learning Microsoft Azure certification course from hkrtrainings! 

How does a client connect to the Traffic Manager?

When a client wants to connect to a service, a DNS query will be sent to the configured recursive DNS service. A recursive DNS service, which is also known as local DNS, does not host the domains directly. It rather encompasses the process of contacting authoritative DNS services to resolve the DNS name. The recursive DNS finds the name server across the internet for the domain in the DNS query sent by the client.

It then contacts the name server to request the DNS record. It then returns the record that points to the traffic manager of the server. The DNS then sends a request for the traffic manager. Upon receiving the request, the traffic manager chooses an endpoint. The chosen endpoint is sent back as a DNS name record. The recursive DNS service finds the domain name server. The IP address of the service endpoint will be returned. The recursive DSN consolidates and gives a single DNS response. The client then connects to the IP address. 

Microsoft Azure Certification Training

  • Master Your Craft
  • Lifetime LMS & Faculty Access
  • 24/7 online expert support
  • Real-world & Project Based Learning

Routing methods in Traffic Manager

To route traffic to different endpoints, Azure Traffic Manager supports six types of traffic-routing methods. The routing method specifies which endpoint is returned through DNS.

  • Priority – When you want to send primary service endpoints for all traffic, you can use the priority method. It provides backup if the primary endpoint is unavailable.
  • Weighted – When you want to distribute traffic across endpoints based on some pre-defined weights or evenly, use the weighted method.
  • Performance – When you want the users to interact with the lowest latency endpoint, then you can use the performance method. In this scenario, the endpoints are located in different geographic locations.
  • Geographic – When you want to route users to a specific endpoint based on the geographic location of the user, use the geographic methods. It employs data sovereignty based on different regions.
  • Multivalue – You can use multivalue when you only have IPv4/IPv6 addresses as endpoints. When a query is received, all the healthy endpoints are returned.
  • Subnet – If you want to map a set of user IP addresses to a specific endpoint, use the subnet method. When a request is received, the endpoint mapped to the source IP address will be returned.

Endpoints in Traffic Manager

An endpoint is referred to as application deployment. When the Traffic Manager receives a DNS request, it checks for all the endpoints and chooses an available one, and returns it as a DNS response. Traffic Manager supports the below 3 types of endpoints.

  • Azure endpoints – These are the services hosted in the Azure cloud.
  • External endpoints – These are the services hosted outside of the Azure cloud like on-premise or a different hosting cloud. These are used for IPv4/IPv6 addresses.
  • Nested endpoints – When you want to create more flexible routing schemes, you can use nested endpoints to combine Traffic Manager profiles for complex deployments. A single Traffic Manager profile can have any type of endpoints in it.
HKR Trainings Logo

Subscribe to our YouTube channel to get new updates..!

Creating a Traffic Manager for an application

Let us create a Traffic Manager profile that provides high availability for your application. Navigate to https://portal.azure.com/ and log in to your Azure account. You have to deploy your web application in two different Azure regions. So, one will act as a primary endpoint and the other acts as a failover endpoint.

Learn more about AWS vs Azure from this Article Difference between Azure and AWS!

Deploy the web application

Click on the ‘Create a resource’ button on the top-left corner. Click on ‘Web’ and click on ‘Web App’. You will get a Basics tab where you can fill in the web application details. Create a resource group and give a name for it. Give a name for your web application. Select ‘Code’ for the ‘Publish’ field. Give ‘ASP.NET V4.7’ for ‘Runtime stack’, select Windows for ‘Operating System’, select ‘East US’ for the ‘Region’ field. Create a new service plan and give a name for it. Select ‘Standard S1’ for the ‘SKU and size’ field.

Go to the Monitoring tab, select no for the ‘Enable application insight’s option. Click on ‘Review and create’. You will get a review page where you can view all the settings. Click on ‘Create’ to create a website. Follow the same steps to deploy the web application in a different Azure region.

Creating a Traffic Manager profile

Click on ‘Create a resource on the top-left corner. Click on ‘Networking’ and then click on the ‘Traffic Manager profile’. Click on ‘Create Traffic Manager profile’ and a settings page appear. Give a name for the Traffic Manager profile, Select ‘Priority’ for the ‘Routing method’ field, select a subscription method, select your existing resource group, and give the location of the resource group for the ‘Location’ field. Click on ‘Create’ to complete the process.

Add endpoints to Traffic Manager

Give the Traffic Manager profile name in the search bar and select your profile from the results. Click on ‘Settings’ in the Traffic Manager profile. Click on ‘Endpoints’ and then click on ‘Add’. Select ‘Azure endpoint’ for the ‘Type’ field. For the ‘Name’ field, enter the endpoint that you want to set as the primary one. Select ‘App Service’ for ‘Target resource type’, select ‘Choose an app service > East US’ for ‘Target resource’, choose 1 for ‘Priority’ field, and click on ‘OK’. Repeat the same steps for the other endpoint and set the priority as 2.

Testing the Traffic Manager profile

You can find the DNS name of your web application in the overview of your Traffic Manager profile. Enter the DNS name in a browser, and you will get the default website of your web application. Now, disable your primary site in the Traffic Manager profile. Select your primary endpoint in the overview section. Click on ‘Disabled’, and then click on ‘Save’. You can observe the status as disabled when you close the primary endpoint. Check the same DNS name in a different browser, you can see that your web application is still available. You are routed to the failover endpoint.

Microsoft Azure Certification Training

Weekday / Weekend Batches

Conclusion

Now that you know how to create a Traffic Manager profile, deploy your web application, create multiple endpoints, and try setting up a Traffic Manager profile. It widely improves website response. To reference an Azure Traffic Manager profile, you can also create an alias record name. You can create a Traffic Manager profile through the Azure portal, Azure CLI, and Azure PowerShell. It follows a pay per use pricing plan.

Other related articles:


Source link